オーストラリア・ニュージーランドの鉄道を紹介します!
AUandNZ Railfan
Australia and New Zealand Railfan
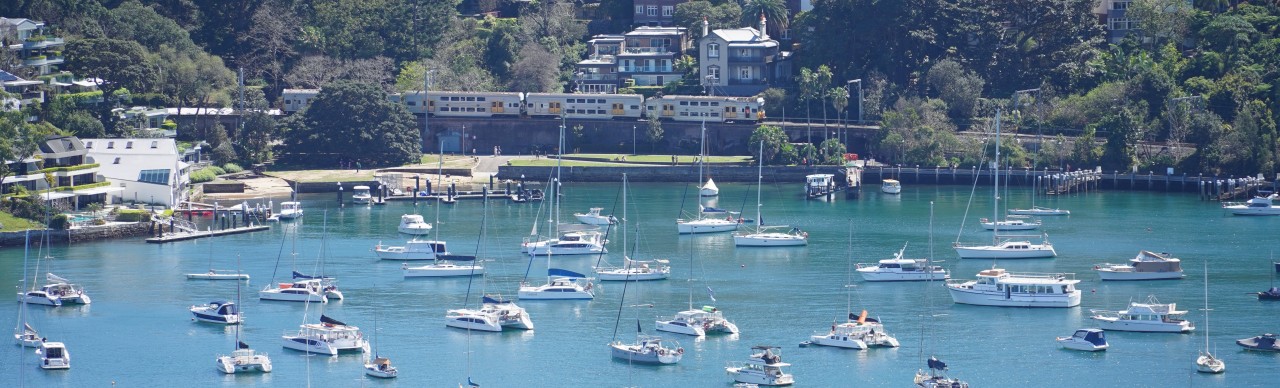
S set ラベンダーベイトレイン
S set Lavender Bay Train
At the NSW Transport Heritage Expo in October 2026, an S set operated as a Lavender Bay train. These stainless-steel electric multiple units served Sydney's suburban rail network for decades, from the 1970s into the 2010s. The Lavender Bay branch once served the original Milsons Point station, located on the northern side of Sydney Harbour Bridge. When the Harbour Bridge opened, the old Milsons Point station was replaced by the current station as part of the new rail connection. The Lavender Bay train offered a glimpse into this fascinating chapter of Sydney's railway history.
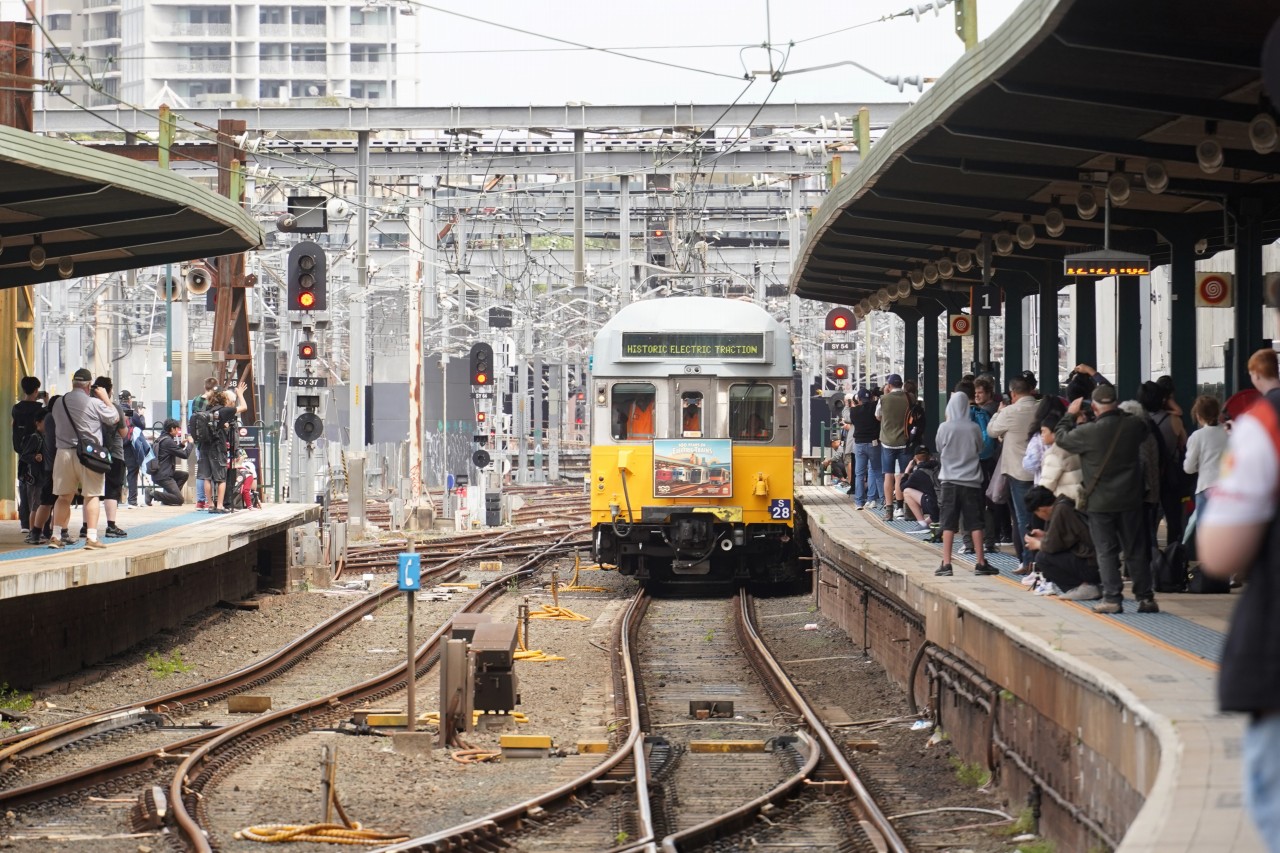
セントラル駅1番線に入線するS setのラベンダーベイトレイン。
1970年代製の銀色の2階建て電車S set(4両編成・S28)による特別列車。セントラル駅1番線を10:20、12:20、14:20に出発し、シドニー・ハーバーブリッジを渡ってラベンダーベイへ向かいます。旧ミルソンズポイント駅付近を経由する、普段は旅客列車がほとんど走らない珍しいルートで、所要時間は約1時間30分です。
A special service operated by the preserved four-car 1970s silver double-deck S set (S28). Departing from Platform 1 at Central Station at 10:20am, 12:20pm and 2:20pm, the train crosses the Sydney Harbour Bridge and travels to Lavender Bay. The route passes near the former Milsons Point station along a rarely used passenger railway line, with a journey time of approximately 1.5 hours.
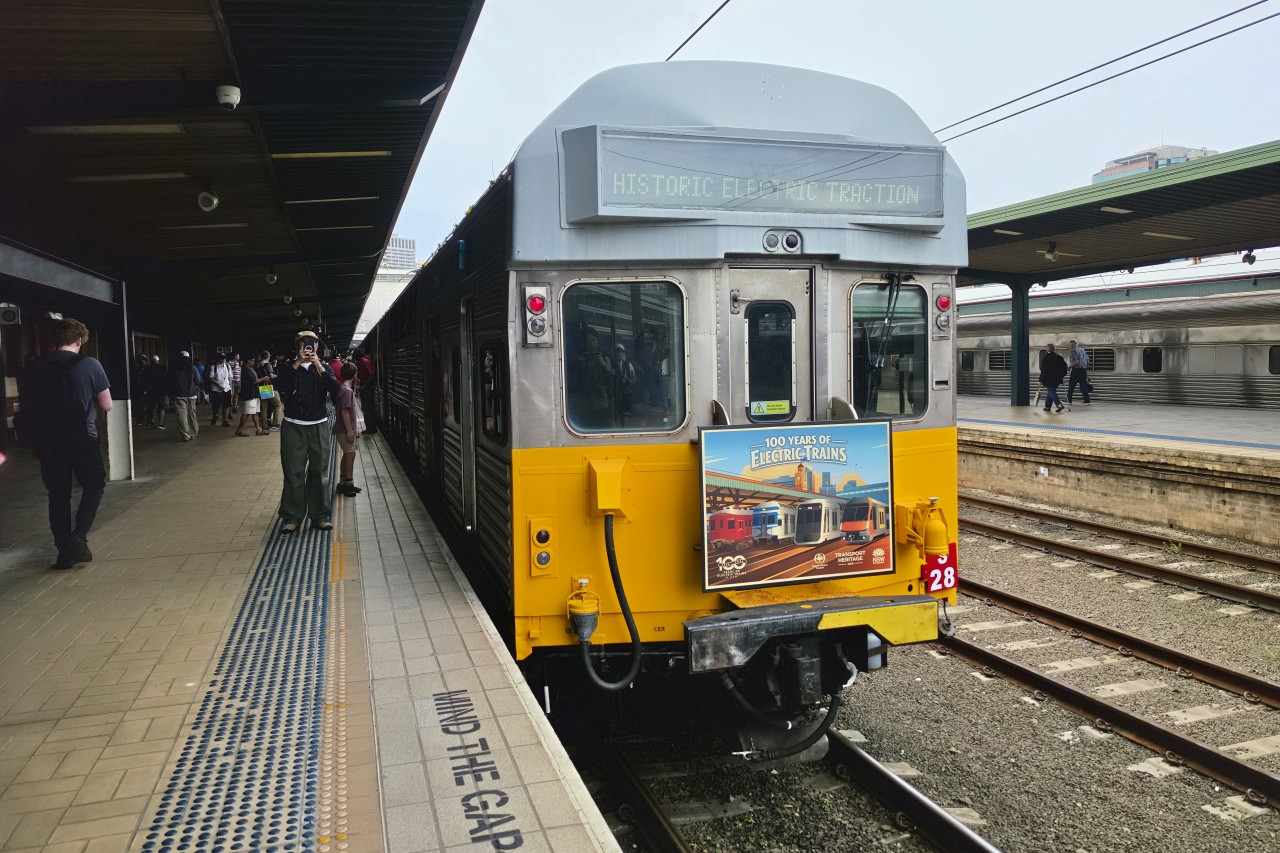
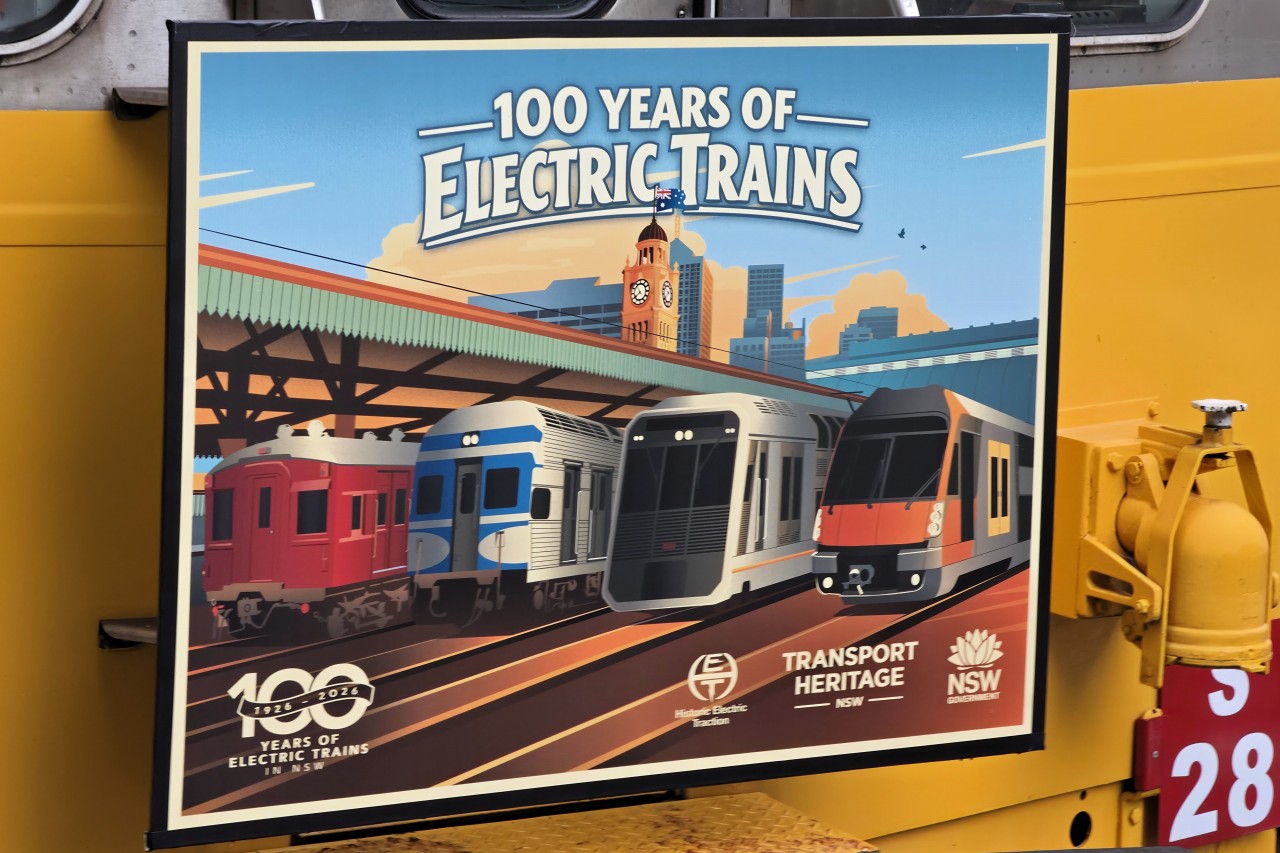
セントラル駅1番線で発車を待つS set。2026年のトランスポートヘリテージエキスポでは、シドニーの鉄道電化100周年を記念したヘッドマークが装着されました。
An S set waits for departure at Platform 1 at Central Station. During the 2026 Transport Heritage Expo, the train carried a special headboard commemorating the 100th anniversary of railway electrification in Sydney.
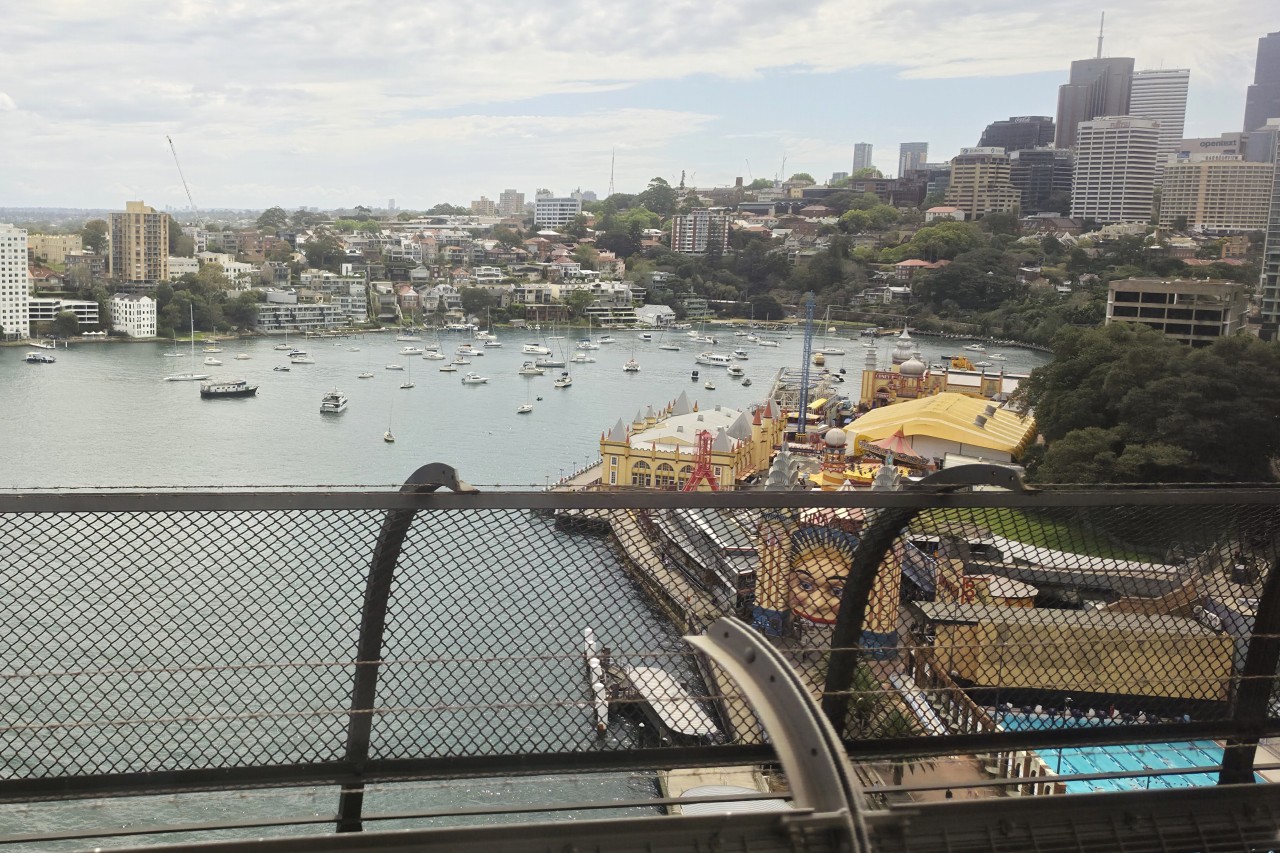
セントラル駅を発車したS setは、イヴリーで方向転換した後、シドニー・ハーバーブリッジを渡ります。車窓からは、これから向かうラベンダーベイと、かつて旧ミルソンズポイント駅があった場所に隣接するルナパークを望むことができます。
After departing Central Station, the S set reverses direction at Eveleigh before crossing the Sydney Harbour Bridge. From the train, passengers can see Lavender Bay, the destination ahead, as well as Luna Park, located beside the site of the former Milsons Point station.
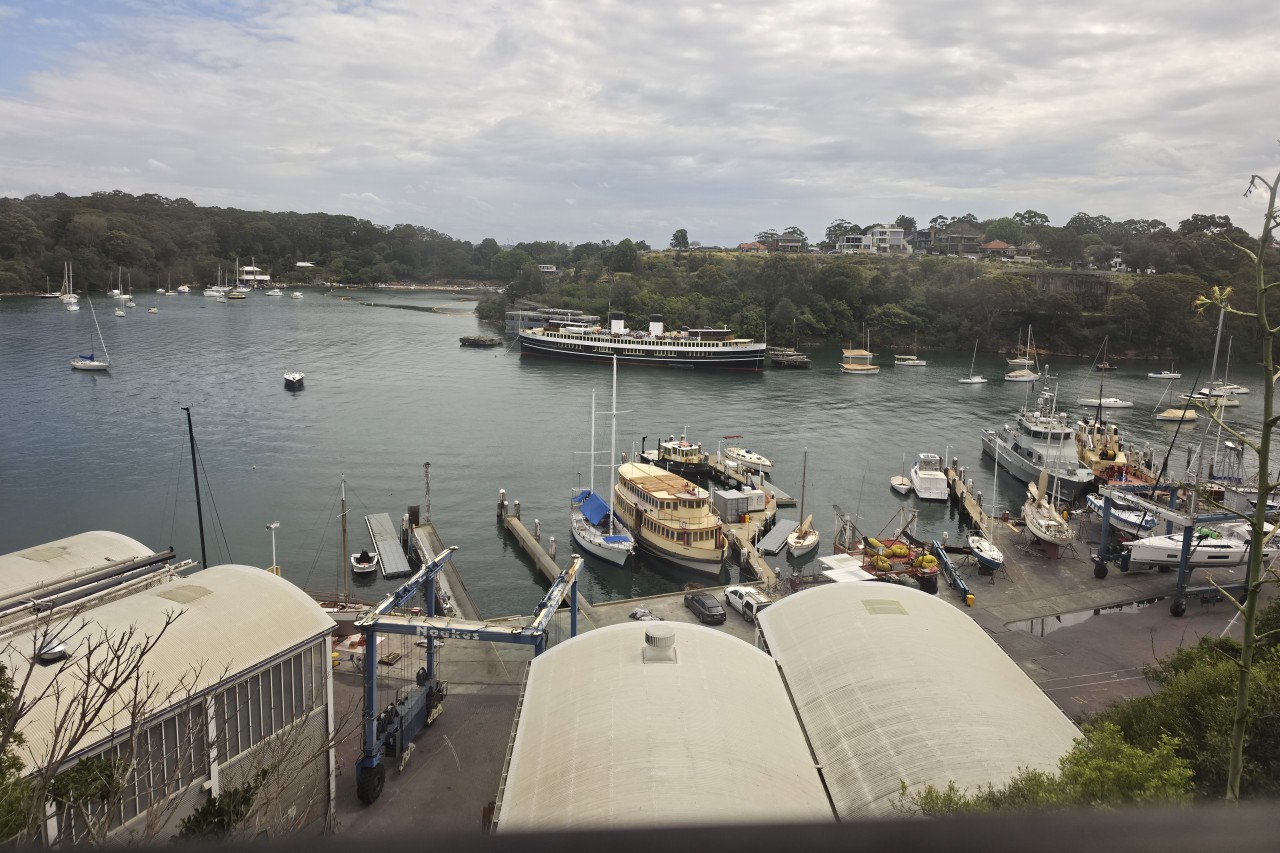
ワイバートン駅で方向転換したS setは、ラベンダーベイへ続く支線に入ります。ベリーズ湾を望む場所でしばらく停車。湾内には大型の客船やヨットが数多く停泊しており、シドニー湾らしい景色が広がっていました。
After reversing at Waverton Station, the S set enters the branch line towards Lavender Bay. The train pauses for a while at a spot overlooking Berry's Bay, where numerous passenger vessels and yachts are moored, creating a classic Sydney Harbour scene.
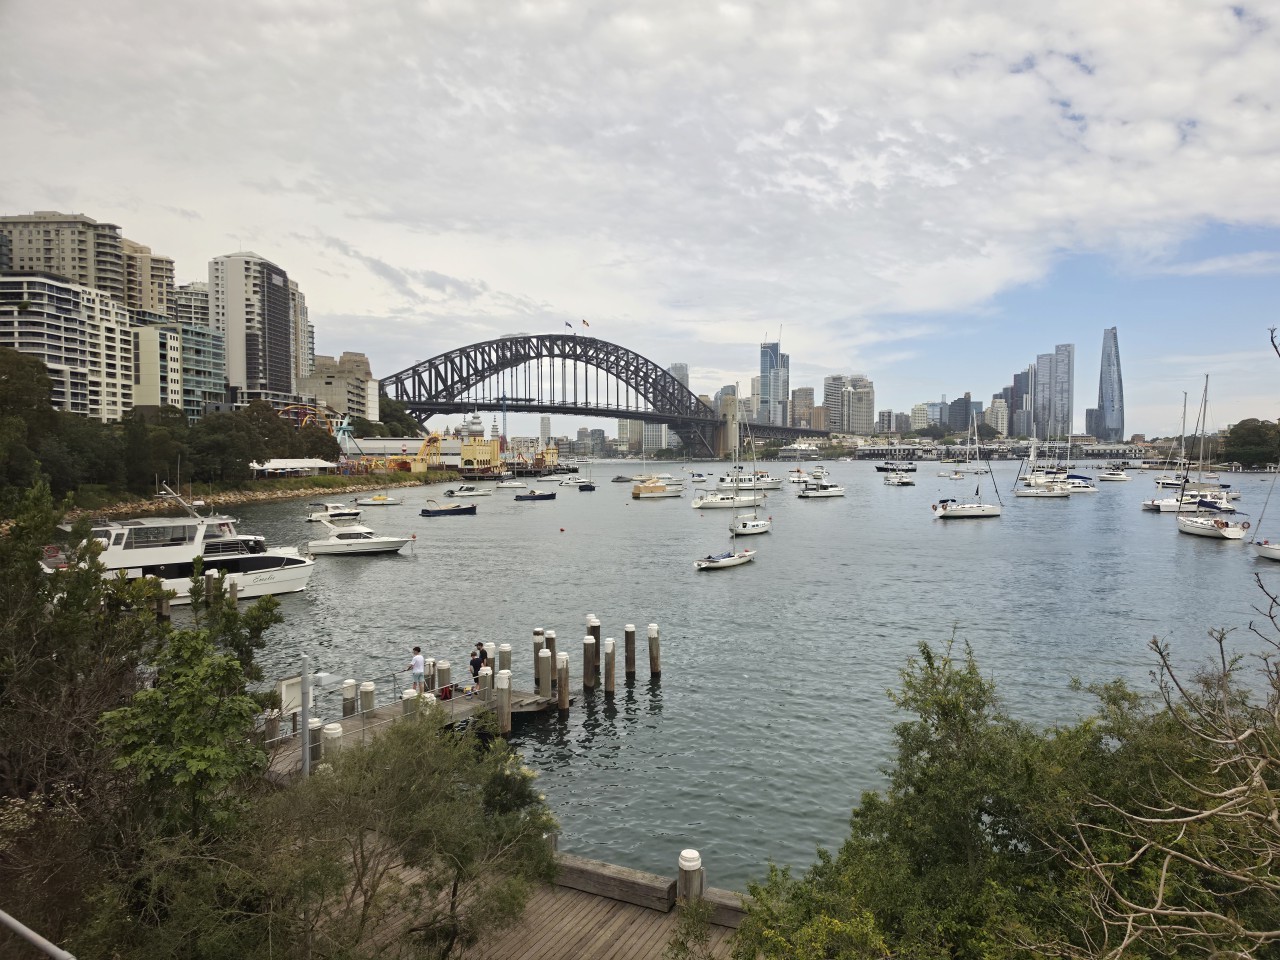
短いトンネルを抜けると、シドニー・ハーバーブリッジとラベンダーベイの景色が広がります。先ほど渡ったハーバーブリッジを今度は下から眺めることができます。橋のたもとには、かつて鉄道の終点だった旧ミルソンズポイント駅の跡地に隣接するルナパークが見えます。
After passing through a short tunnel, Sydney Harbour Bridge and Lavender Bay come into view. The bridge that the train crossed earlier can now be seen from below. At its northern end is Luna Park, next to the site of the former Milsons Point station, which once served as the railway terminus.
2026年10月のトランスポートヘリテージエキスポで運行された、S setによるラベンダーベイトレインの全区間車窓動画です。セントラル駅を出発し、シドニーの地下区間を通ってハーバーブリッジを渡り、ラベンダーベイの旧ミルソンズポイント駅付近へ。折り返して再びハーバーブリッジを渡り、セントラル駅へ戻るまでの車窓風景を収録しました。
普段は旅客列車が走らないラベンダーベイ支線や、シドニー・ハーバーブリッジ、ベリーズ湾など、歴史ある特別列車ならではの景色をお楽しみください。
This video features the complete journey aboard an S set Lavender Bay train during the Transport Heritage Expo in October 2026. Departing from Central Station, the train travels through Sydney's underground railway, crosses the Sydney Harbour Bridge and reaches the former Milsons Point station area at Lavender Bay. It then reverses direction, crosses the Harbour Bridge again and returns to Central Station.
Enjoy the unique views from this special heritage train, including the rarely used Lavender Bay branch, Sydney Harbour Bridge and Berry's Bay.
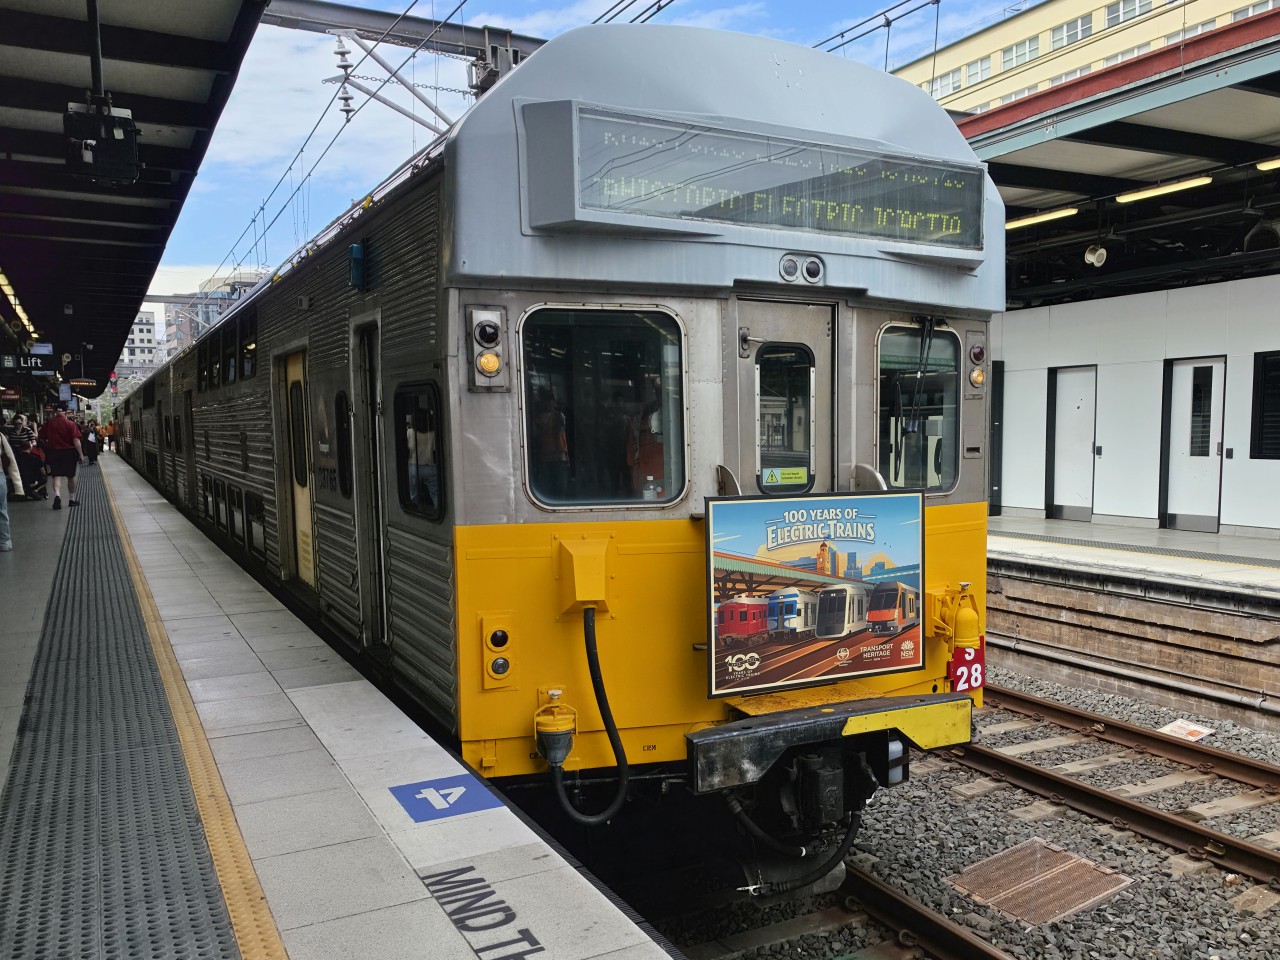
再びセントラル駅に戻ってきたS set。出発時は長距離列車が発着する1番線からの発車でしたが、到着時はシティサークルへ直通する近郊列車が発着するホームで降車となりました。
実は、日本を出発した時点では、このラベンダーベイトレインに乗車する予定はありませんでした。それでも、さまざまなご縁があって乗車することができ、貴重な体験となりました。
The S set returns to Central Station. The journey began at Platform 1, normally used by long-distance trains, but on arrival, passengers alighted at a platform used by suburban trains running directly onto the City Circle.
When I left Japan, I had not booked a ticket for this Lavender Bay train. Thanks to a fortunate turn of events, I was able to experience this special journey, making it a truly memorable part of my trip.
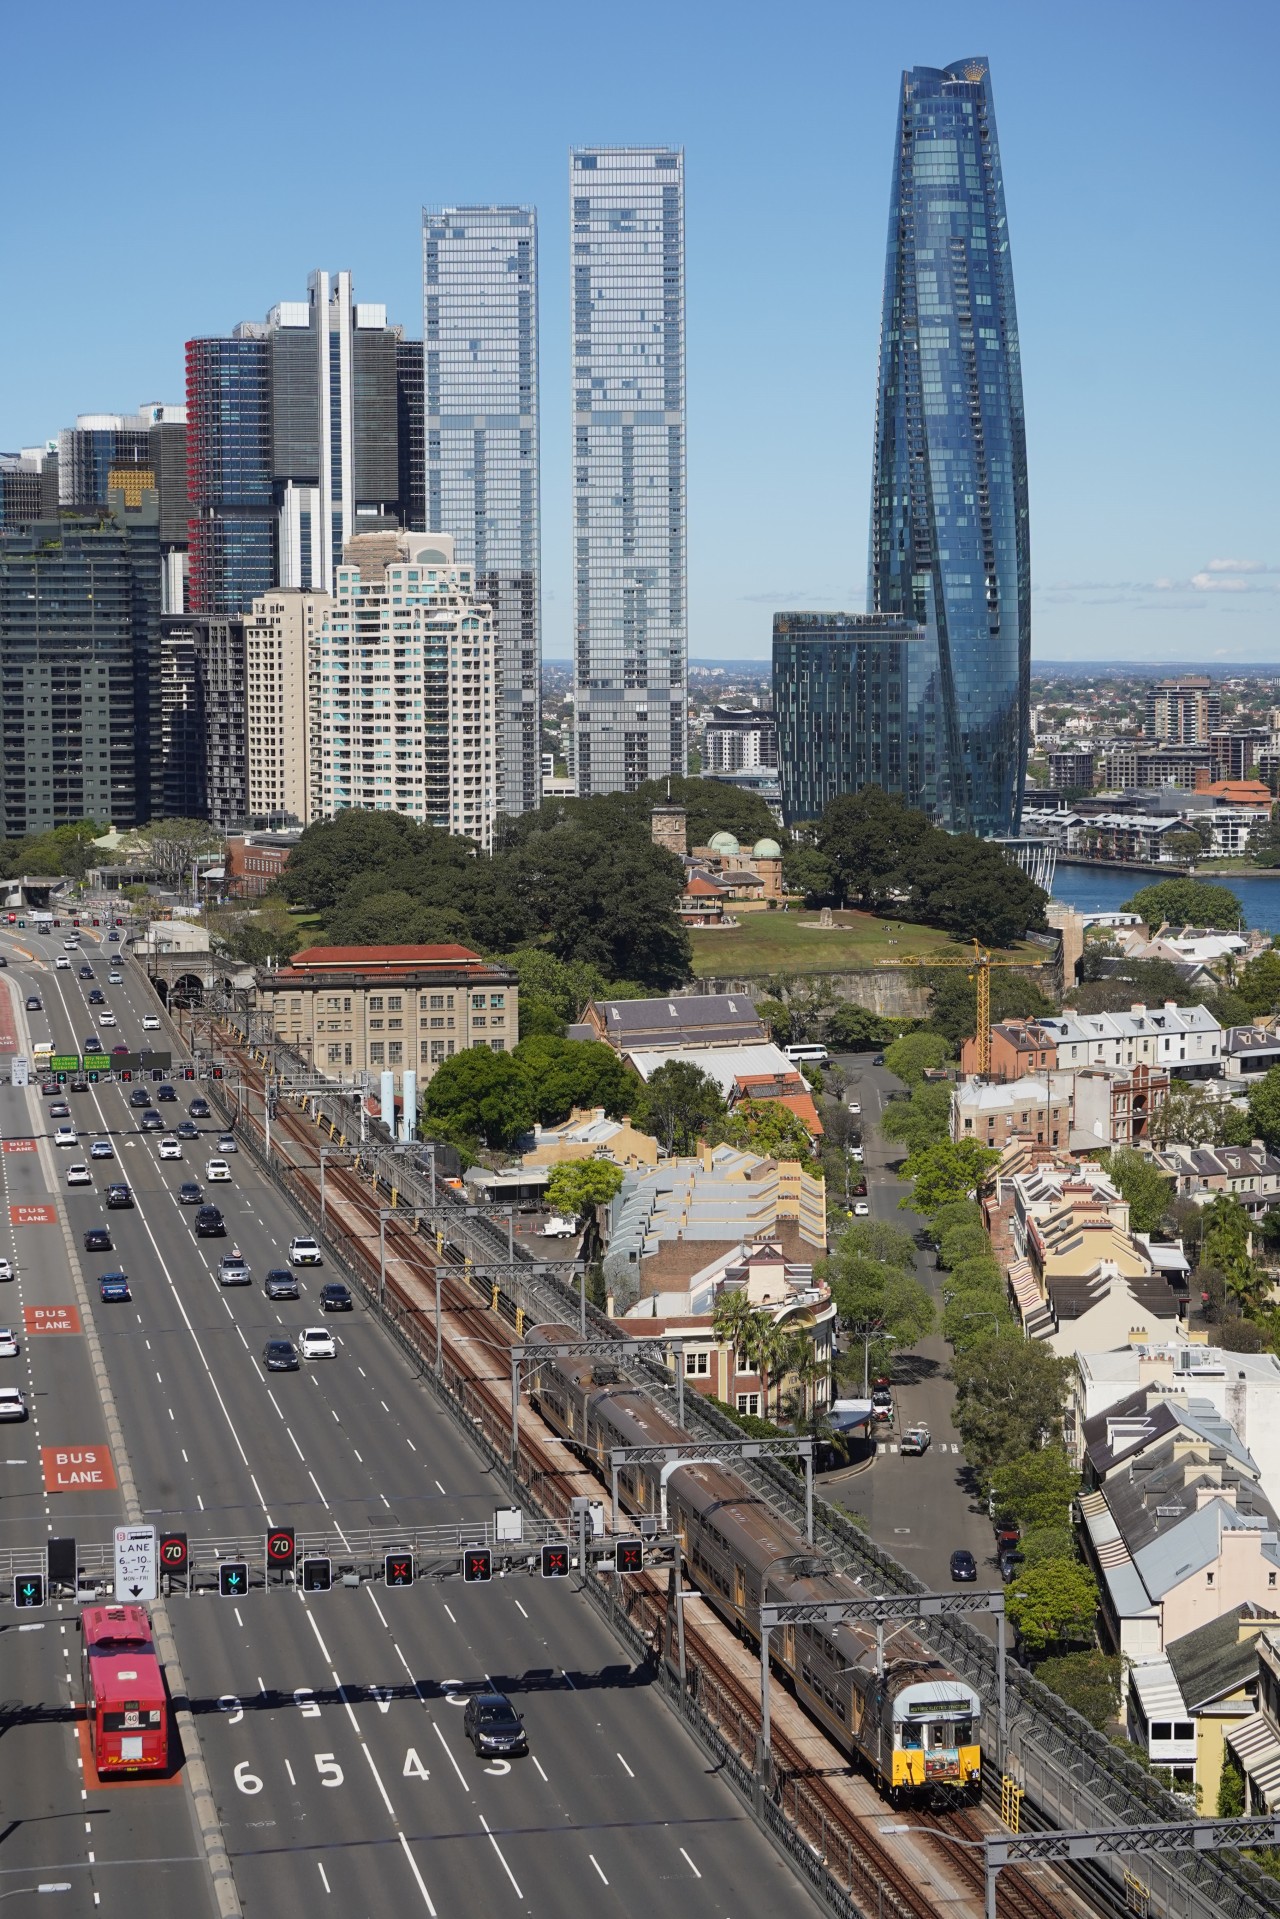
2019年に引退したS setがシドニー・ハーバーブリッジを走る姿を撮影するため、ブリッジミュージアムの展望台から撮影しました。
この日は、まずシティで別の列車を撮影した後、サーキュラーキー駅から約200段の階段を登ってハーバーブリッジへ。さらに、橋の支柱上部に設けられたパイロン展望台へ向かい、内部の階段を約200段登って撮影場所に到着しました。こうして苦労してたどり着いた展望台から、貴重なS setの走行シーンを撮影することができました。
I wanted to capture an S set crossing the Sydney Harbour Bridge, even though these trains had been retired in 2019. To do so, I filmed from the observation deck of the Harbour Bridge Pylon Lookout.
After filming another train in the city, I climbed approximately 200 steps from Circular Quay Station to reach the Harbour Bridge. The Pylon Lookout is located near the top of one of the bridge's stone pylons, requiring another climb of around 200 steps inside the pylon to reach the observation deck. After this challenging climb, I was able to capture the rare sight of an S set crossing the bridge.
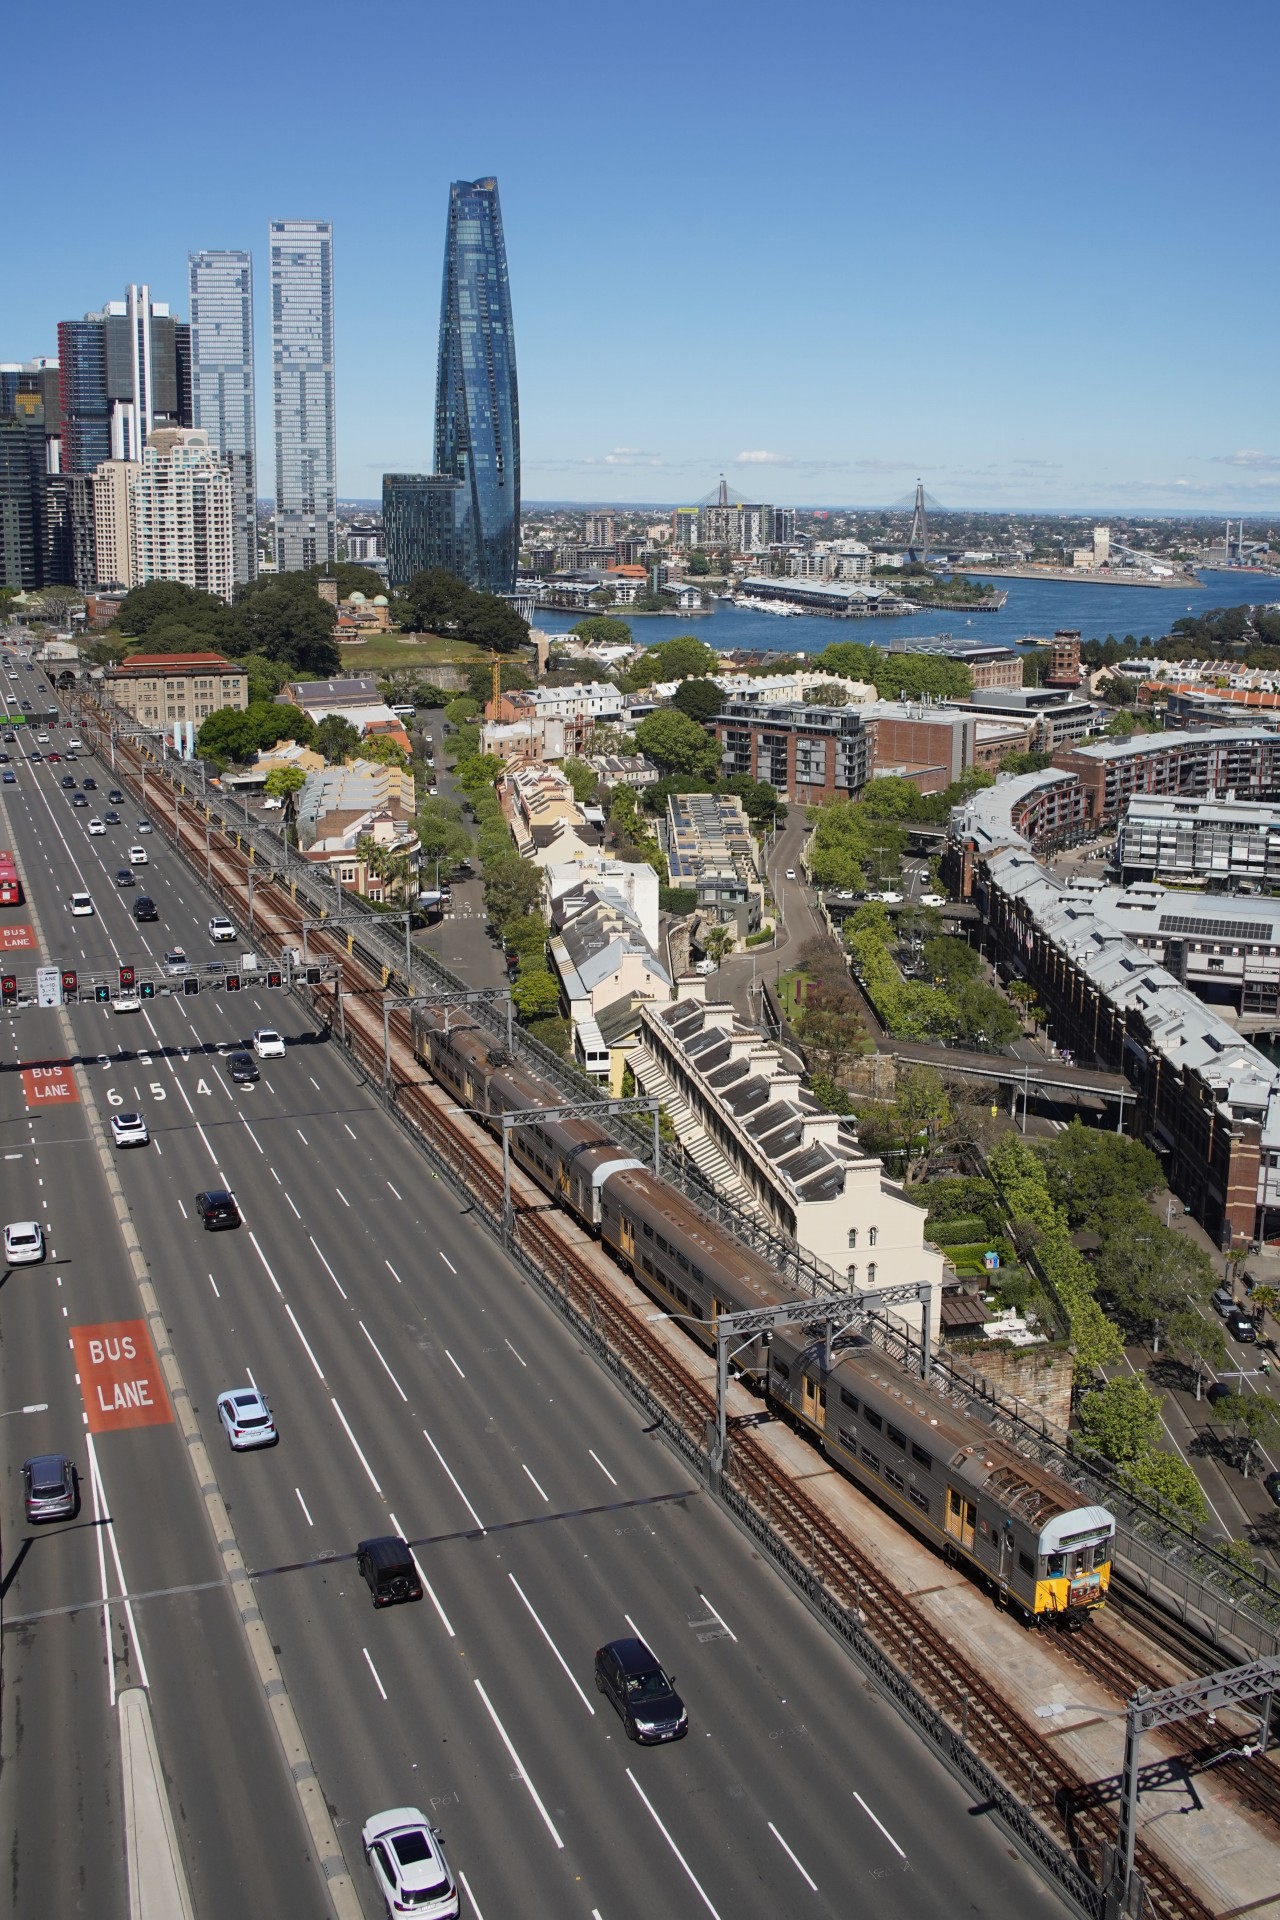
ハーバーブリッジに差しかかるS setを順光で撮影。通常、この撮影地は朝の時間帯が順光となりますが、セントラル駅を10時に出発する列車では通過時間が遅く、車体側面が影になってしまいます。
ところが、エキスポ2日目の日曜日は、ちょうどシドニーのサマータイム開始日。時計が1時間進んだことで、列車の通過時刻も現地時間では1時間早くなり、車体側面にも光が当たる好条件で撮影することができました。
I captured the S set approaching the Sydney Harbour Bridge in favourable sunlight. This location is best for front-lit photography in the morning, but with the train normally departing Central Station at 10:00, the side of the train would usually be in shadow by the time it passed.
However, the second day of the Expo fell on the Sunday when daylight saving time began in Sydney. As the clocks went forward by one hour, the train passed this location an hour earlier by local clock time, allowing me to photograph the S set with sunlight illuminating its side.
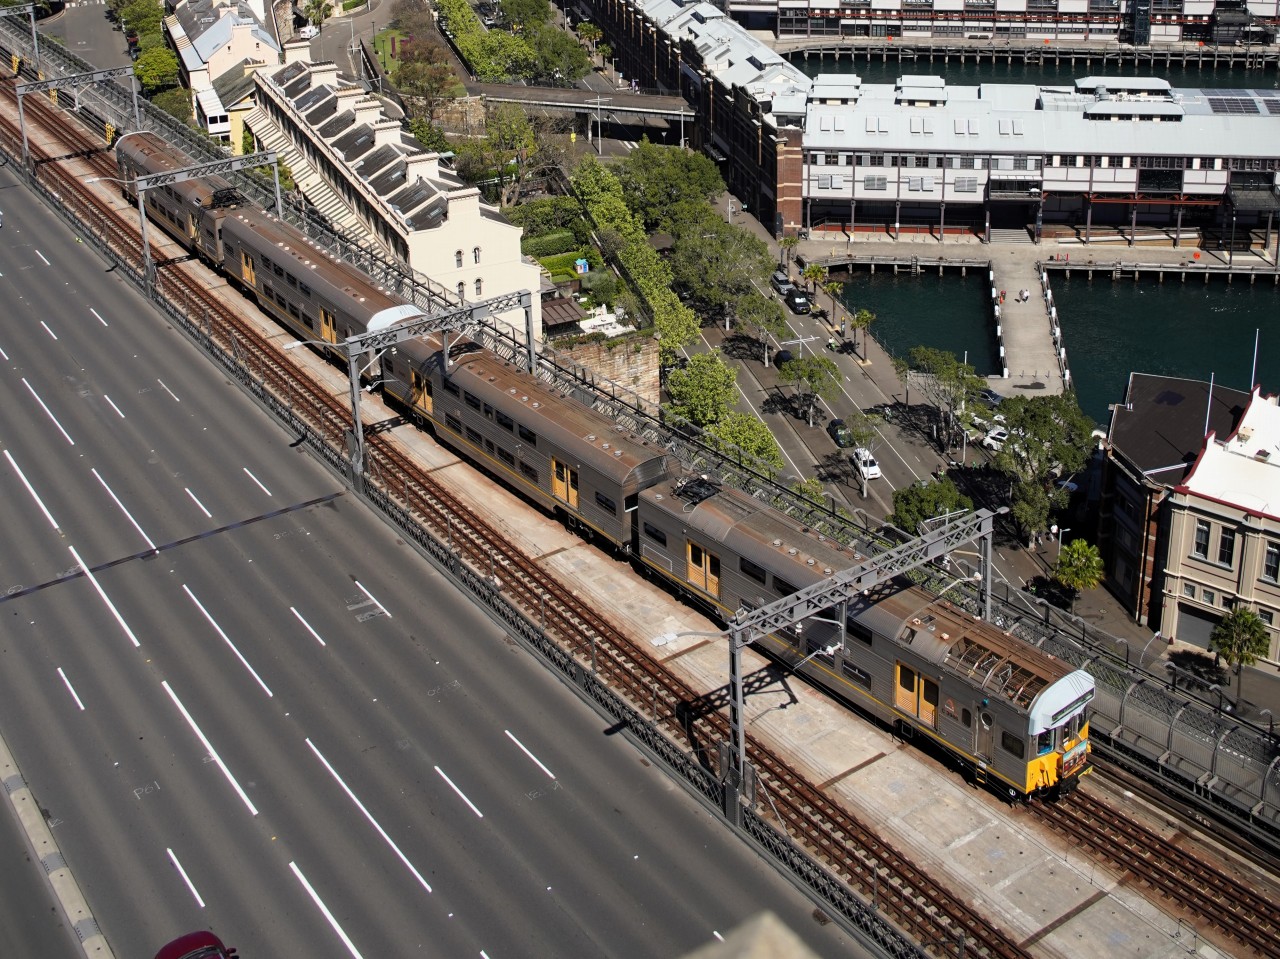
ハーバーブリッジに差し掛かるS setの4両編成。初めてオーストラリアを訪れた2010年には、8両編成のS setがシドニー各地を走る姿をあちこちで見ることができました。しかし、2026年現在、動態保存されて運転されているのは、この4両編成のみとなっています。引退した車両をこうして保存し、再び走る姿を見せてくれることに感謝です!
A four-car S set approaches the Sydney Harbour Bridge. When I first visited Australia in 2010, eight-car S sets could be seen running all over Sydney. However, as of 2026, this four-car set is the only S set preserved in operational condition. I am truly grateful to everyone who has preserved these historic trains and made it possible to see them running again!
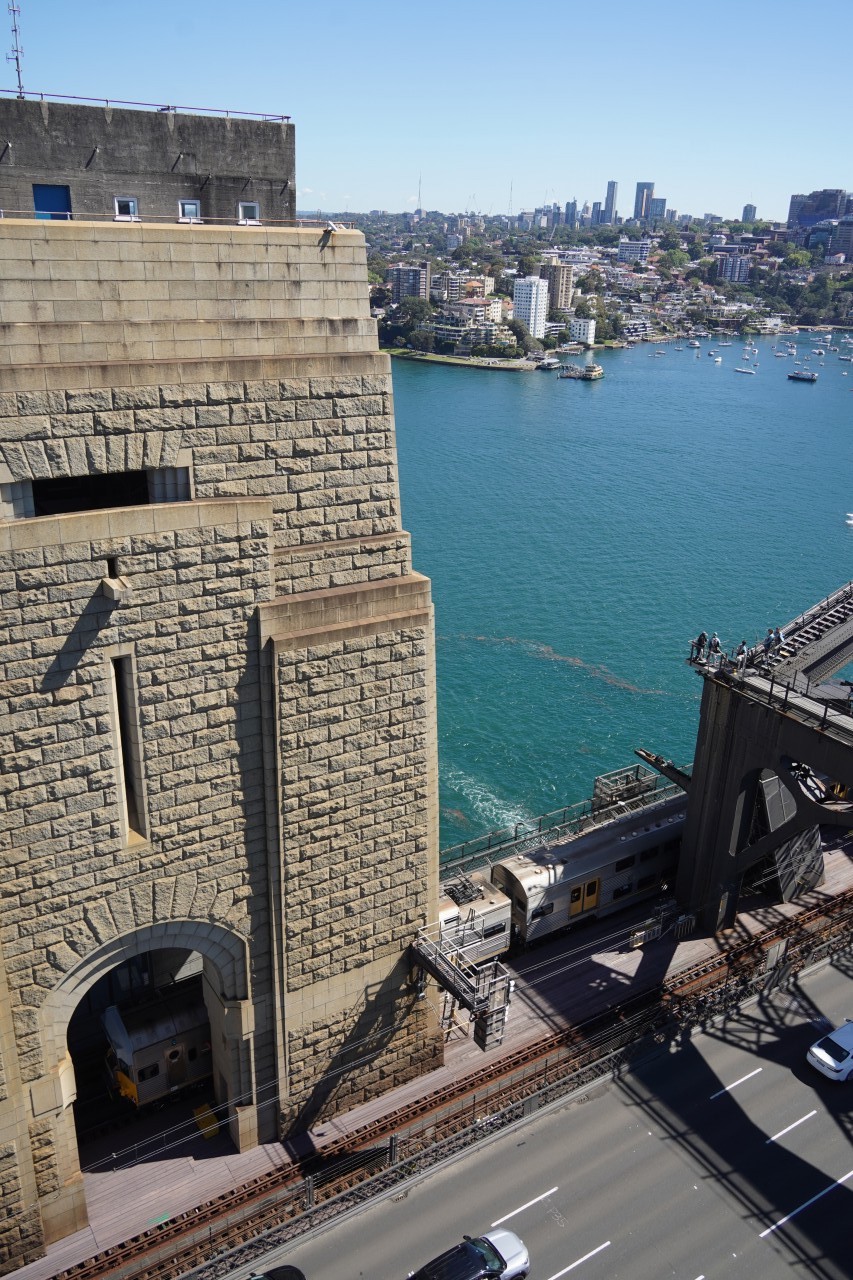
ハーバーブリッジのパイロンのアーチ越しに顔をのぞかせるS set。石造りのパイロンと電車の組み合わせが印象的な光景です。奥には、このあと列車が近くを通るラベンダーベイの景色も見えます。
The S set appears through an arch in one of the Sydney Harbour Bridge's stone pylons. The combination of the historic stone structure and the passing train creates a striking scene. In the background, Lavender Bay can also be seen, where the train will soon pass nearby.
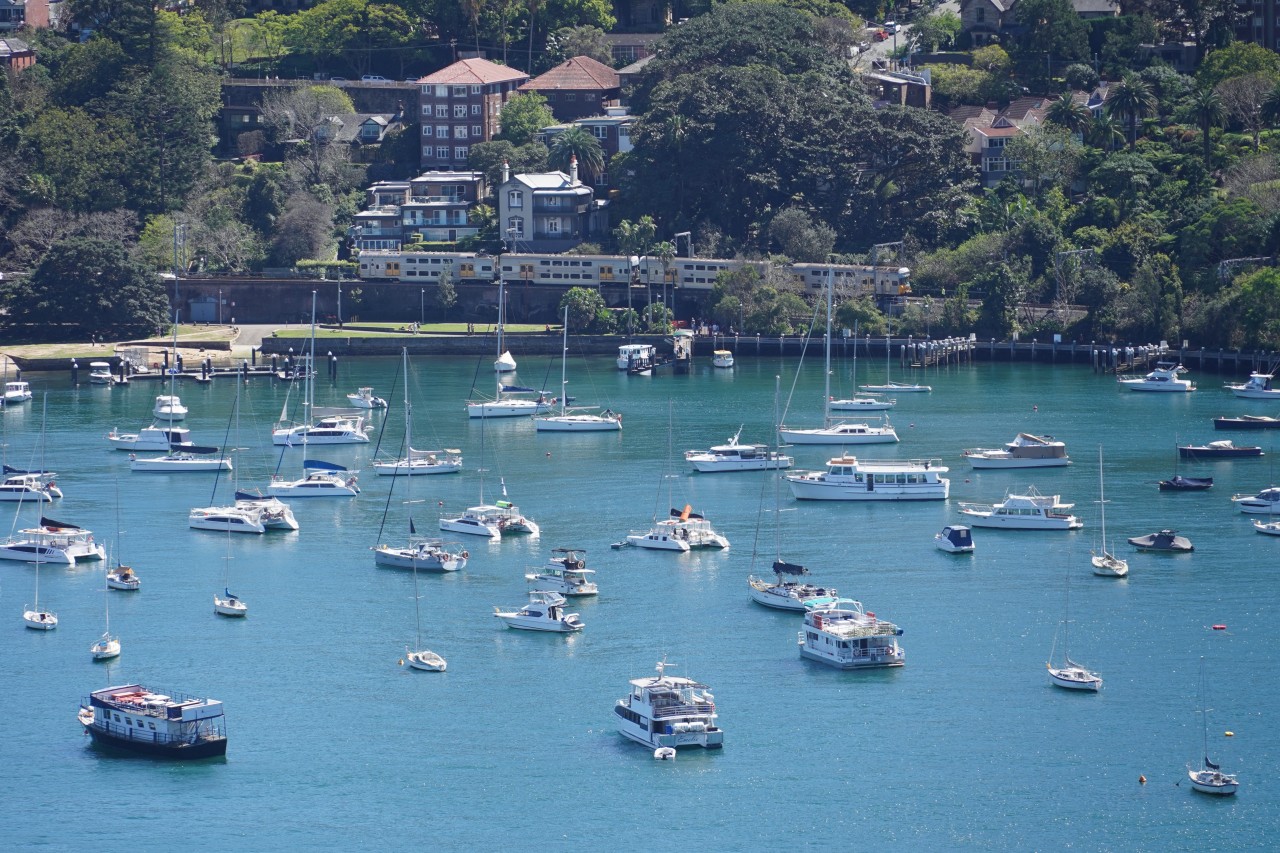
ワイバートン駅で折り返し、ラベンダーベイに到着したS setをブリッジミュージアムの展望台から撮影。海沿いを走るS setの姿を撮影できる、数少ない貴重なスポットです。シドニー・ハーバーの美しい景色とともに、ラベンダーベイ支線を走るS setの姿を収めることができました。
After reversing at Waverton Station, the S set arrives at Lavender Bay, captured from the observation deck of the Harbour Bridge Pylon Lookout. This is one of the few vantage points where the S set can be photographed running alongside the waterfront. The view combines the train on the Lavender Bay branch with the beautiful scenery of Sydney Harbour.
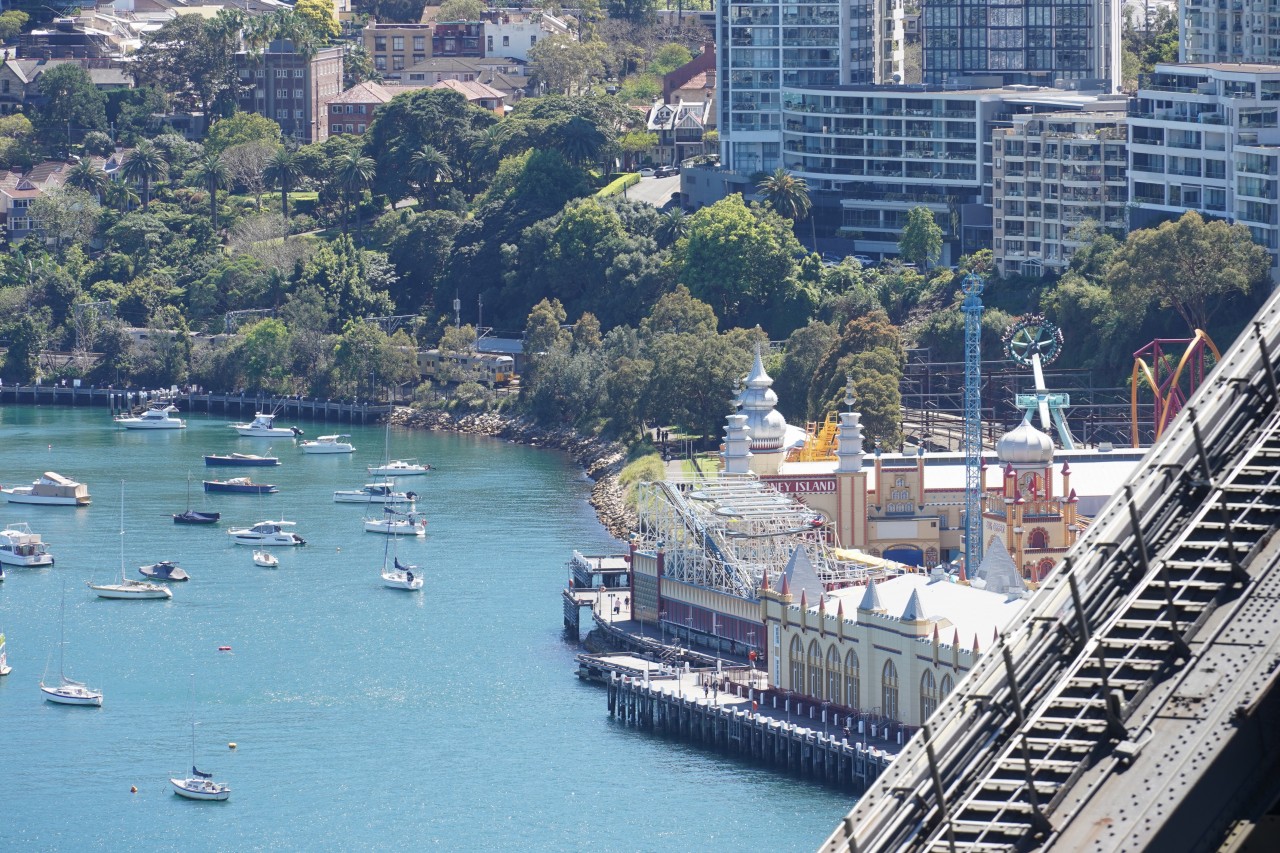
ルナパークに隣接する、旧ミルソンズポイント駅跡地の留置線に差し掛かるS set。この留置線は、ラッシュ時の増発用列車を留置するために使用されています。そのため、イベント開催時以外でも、タイミングが合えばラッシュ時間帯の前後に回送列車を見ることができます。
The S set approaches the stabling sidings at the site of the former Milsons Point station, next to Luna Park. These sidings are used to stable additional trains for peak-hour services. Even outside special events, it is sometimes possible to spot empty trains being moved to or from the sidings around the morning or evening peak periods, if the timing is right.
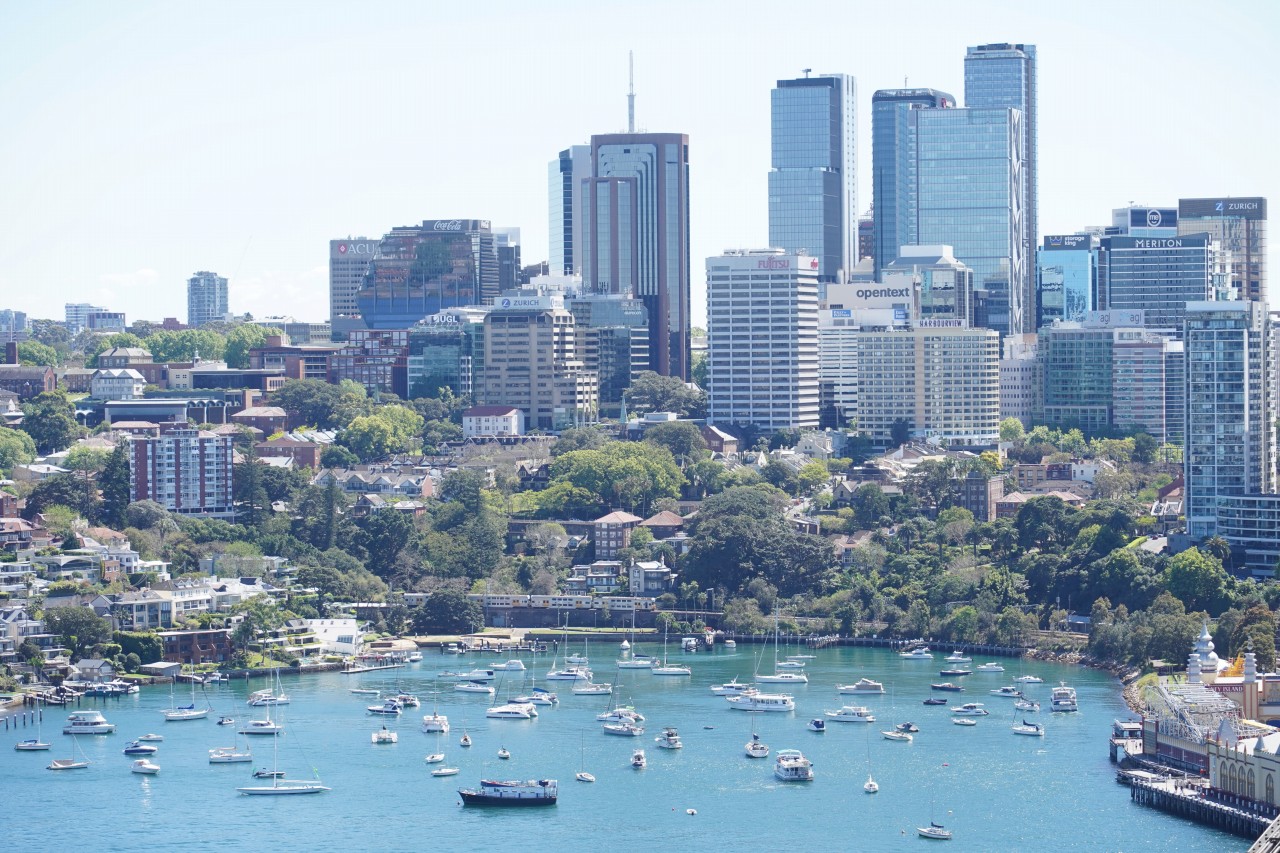
旧ミルソンズポイント駅跡地を発車し、ワイバートン駅方面へ向かうS set。途中、ラベンダーベイの景色を楽しむために一旦停車します。
The S set departs from the site of the former Milsons Point station and heads towards Waverton Station. Along the way, the train makes a brief stop to allow passengers to enjoy the scenery of Lavender Bay.
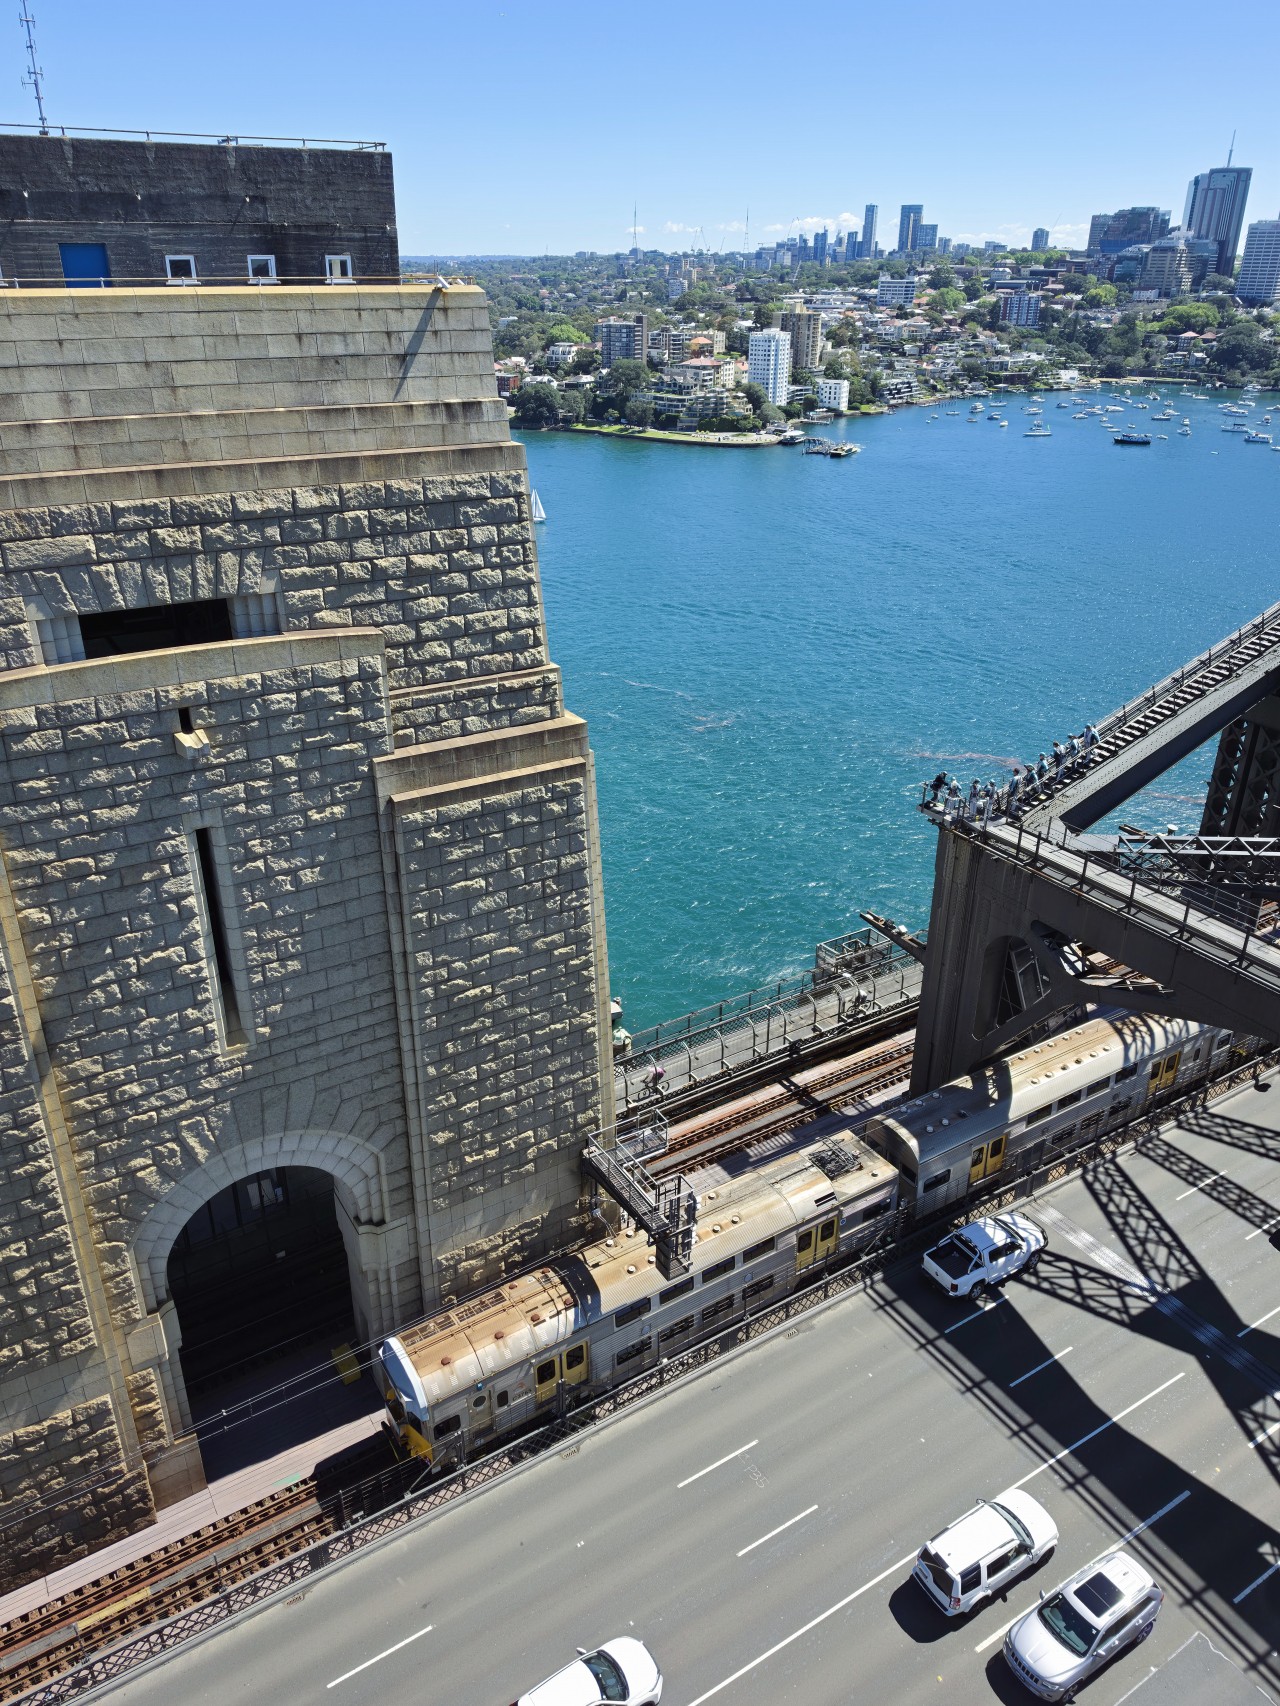
ブリッジミュージアムの展望台から、ハーバーブリッジを渡る帰りのS setを撮影。往路の列車はパイロン内部を通過しましたが、パイロンを貫通しているのは下り線のみのため、復路の列車はパイロンの手前を通過します。
The returning S set crosses the Sydney Harbour Bridge, photographed from the Harbour Bridge Pylon Lookout. The outbound train passed through the pylon, but only the down line runs through it, so the returning train passes in front of the pylon instead.
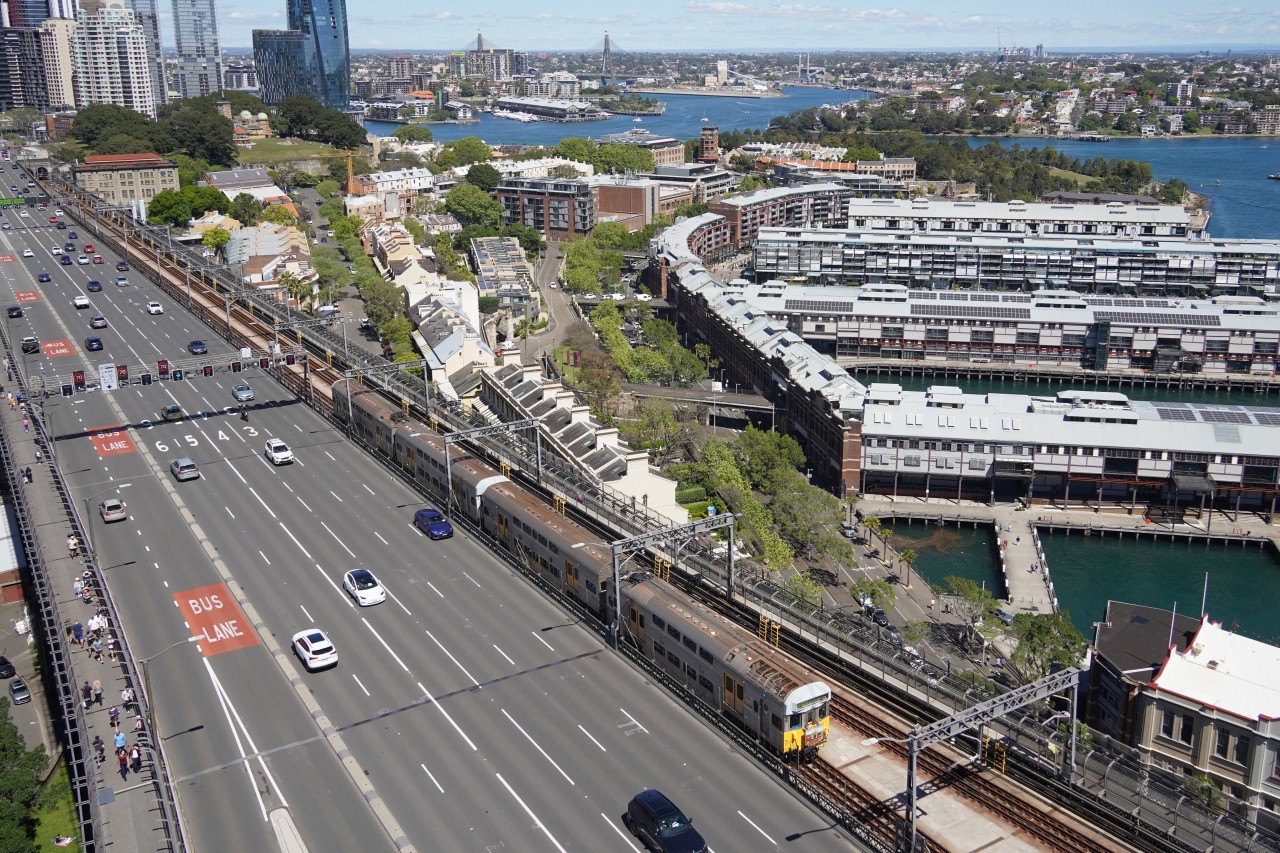
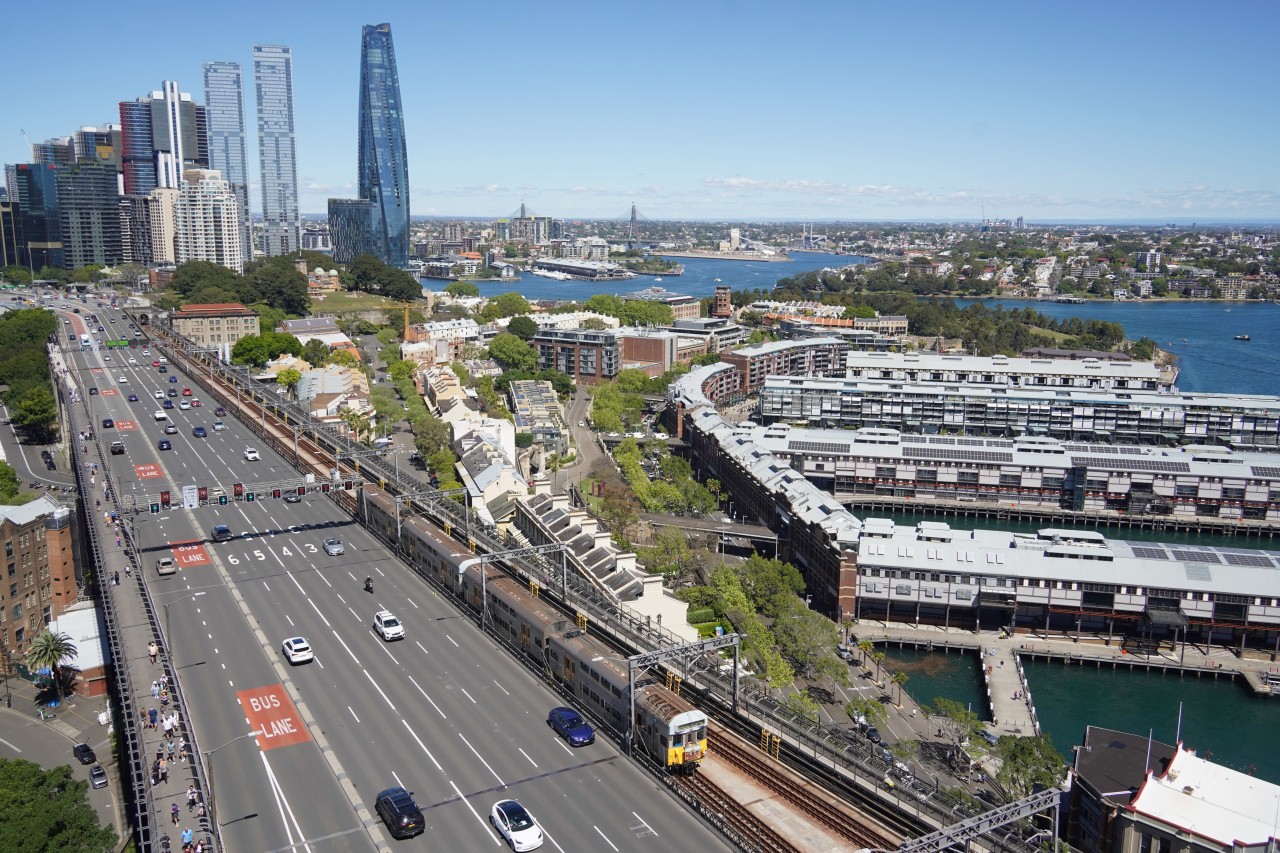
再びハーバーブリッジを渡り、シティ方面へ戻るS set。先ほど撮影した往路の列車では車体側面にも日が当たっていましたが、それから約1時間が経過した復路では、側面が影になっていました。
サマータイム開始前であれば、この復路と同じような光線状態が往路の一番列車でも見られたはずです。今回、往路を順光で撮影できたのは、サマータイムによって列車の通過時刻が早まったおかげだと、改めて実感しました。
The S set crosses the Sydney Harbour Bridge once again, heading back towards the city. When I photographed the outbound train earlier, sunlight illuminated the side of the train. However, about an hour later, the side was already in shadow as the return service crossed the bridge.
Before daylight saving time began, the first outbound train would have passed under similar lighting conditions to those seen on this return journey. This made me appreciate once again how daylight saving time allowed me to capture the outbound train in favourable sunlight.
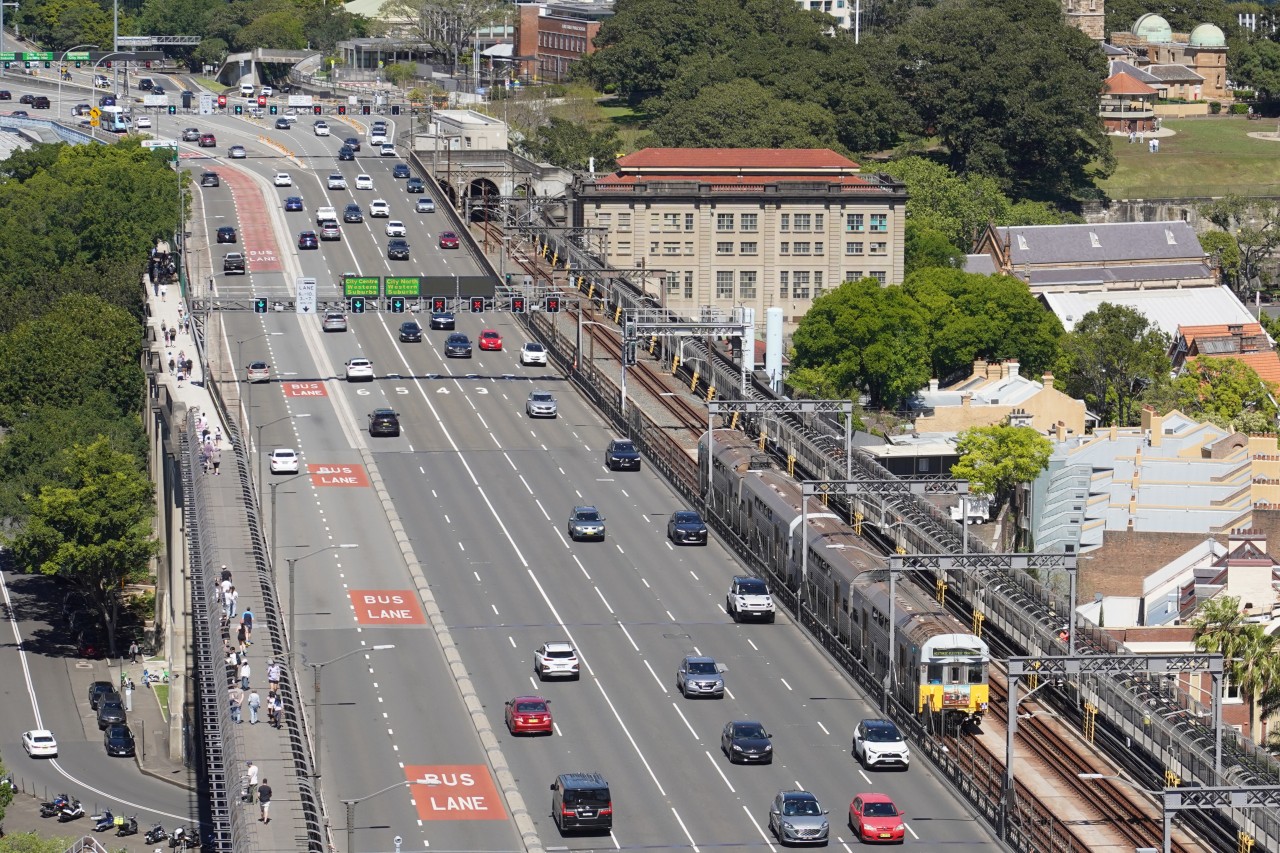
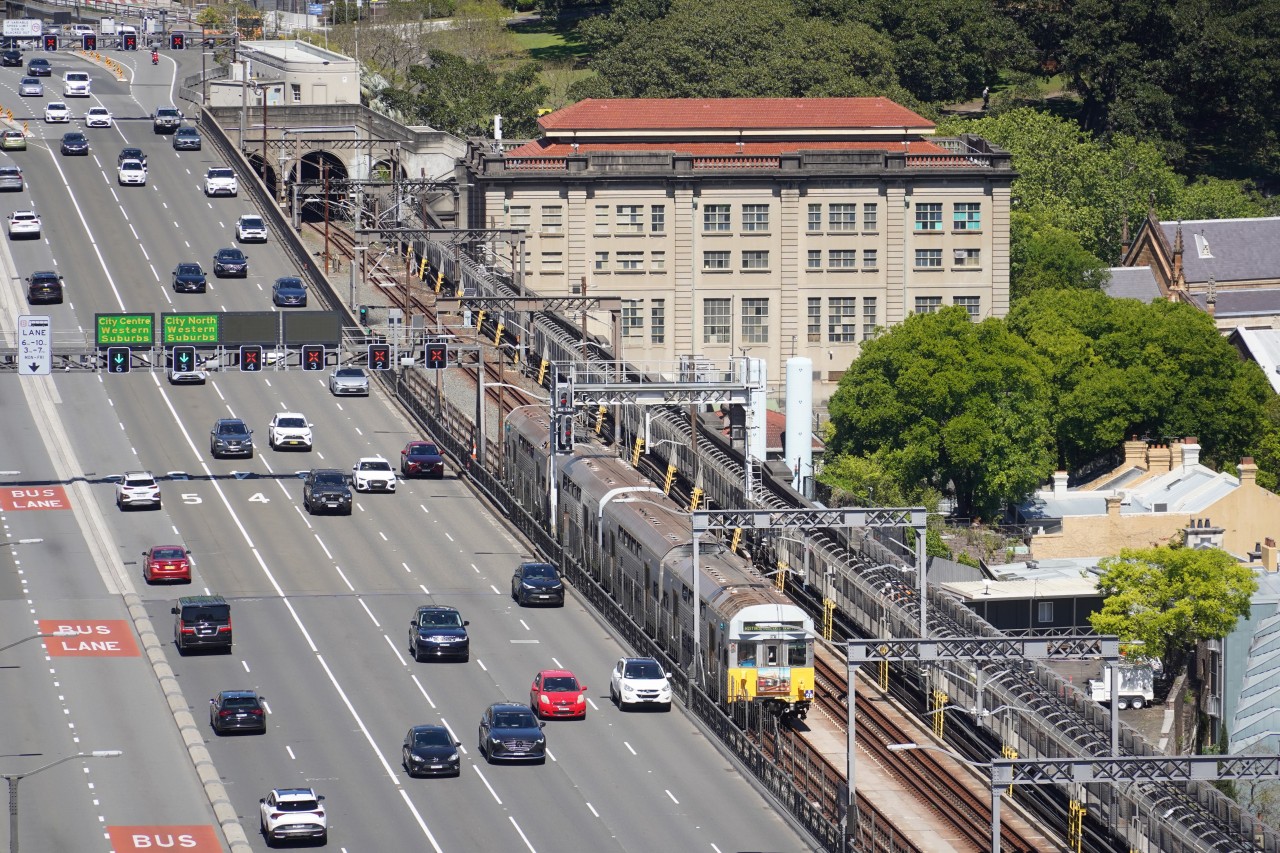
ハーバーブリッジを渡り終え、シティサークルのトンネルへと向かうS set。通常、シティサークル内では列車は各駅に停車しますが、このラベンダーベイトレインは特別運行のため、途中駅には停車せずセントラル駅まで直行します。
The S set has crossed the Sydney Harbour Bridge and heads towards the City Circle tunnel. Normally, trains stop at every station along the City Circle, but this special Lavender Bay service runs express to Central Station without stopping at the intermediate stations.
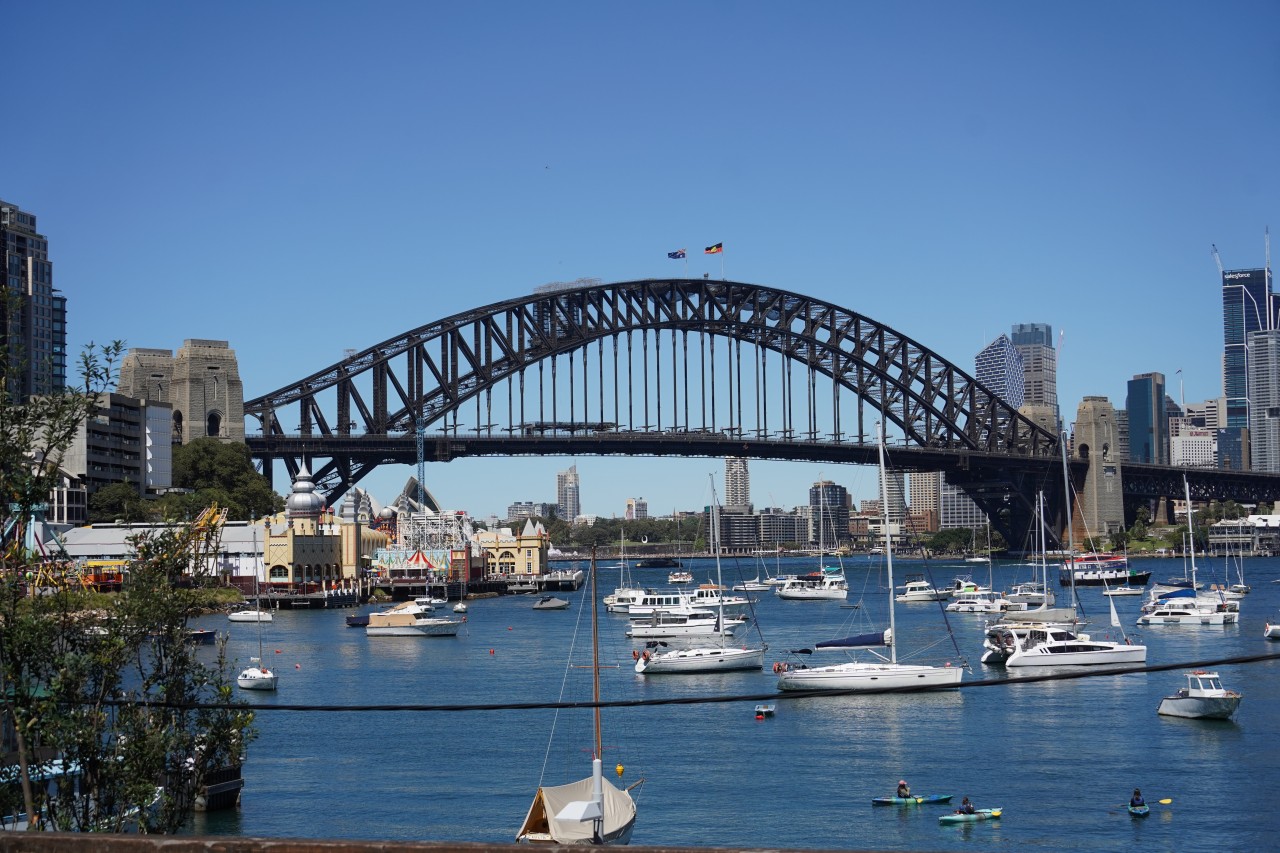
ラベンダーベイから、シドニー・ハーバーブリッジを渡るS setを撮影。橋の中央付近を走るS setの姿を捉えていますが、あまりにも大きな橋のスケールに対して車両が小さく、ほとんど見分けがつかないほどです。それでも、巨大なハーバーブリッジを渡るS setの姿は印象的です。
An S set crosses the Sydney Harbour Bridge, photographed from Lavender Bay. The train can be seen near the middle of the bridge, but it looks tiny against the enormous structure, making the carriages almost impossible to distinguish. Even so, the sight of an S set crossing this iconic bridge is impressive.
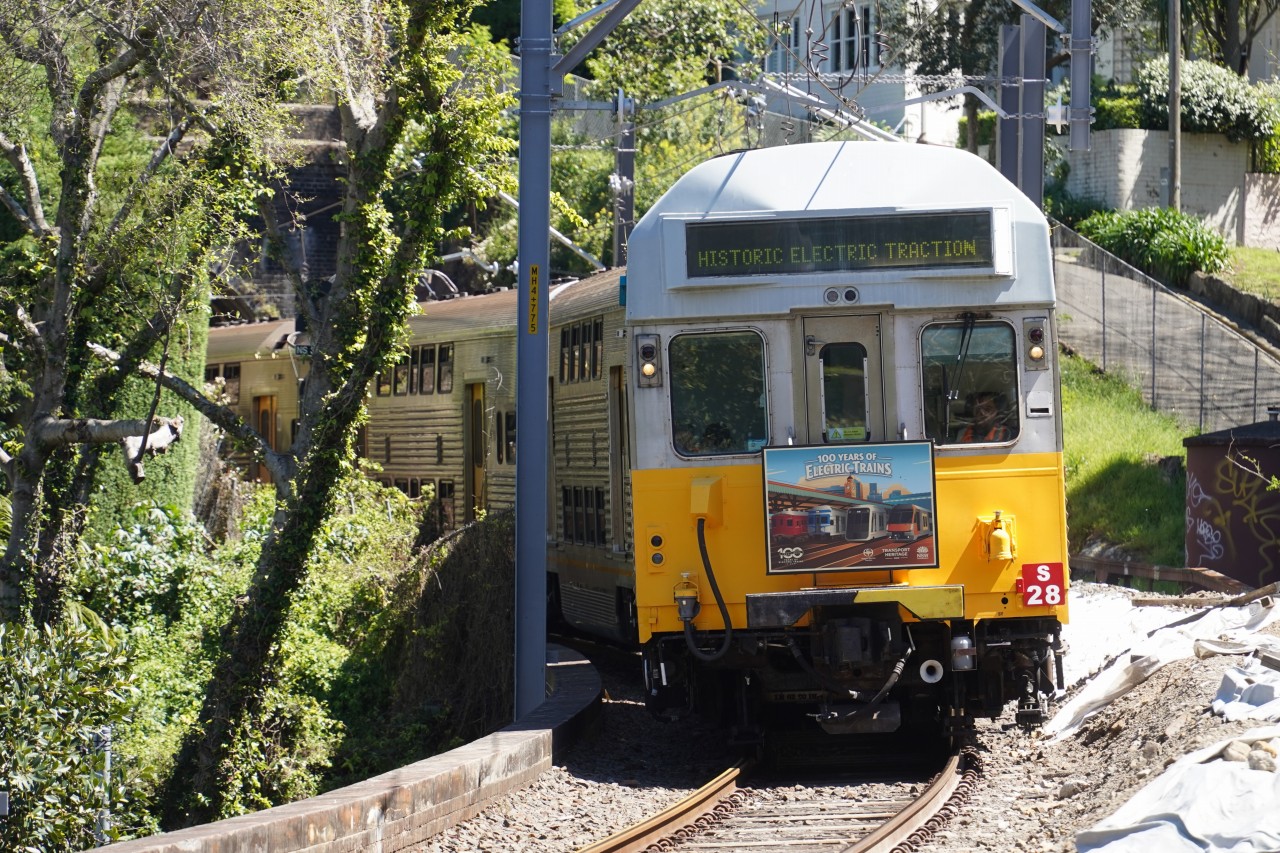
ワイバートン駅とラベンダーベイの間にある短いトンネルを抜けるS set。
An S set emerges from the short tunnel between Waverton Station and Lavender Bay.
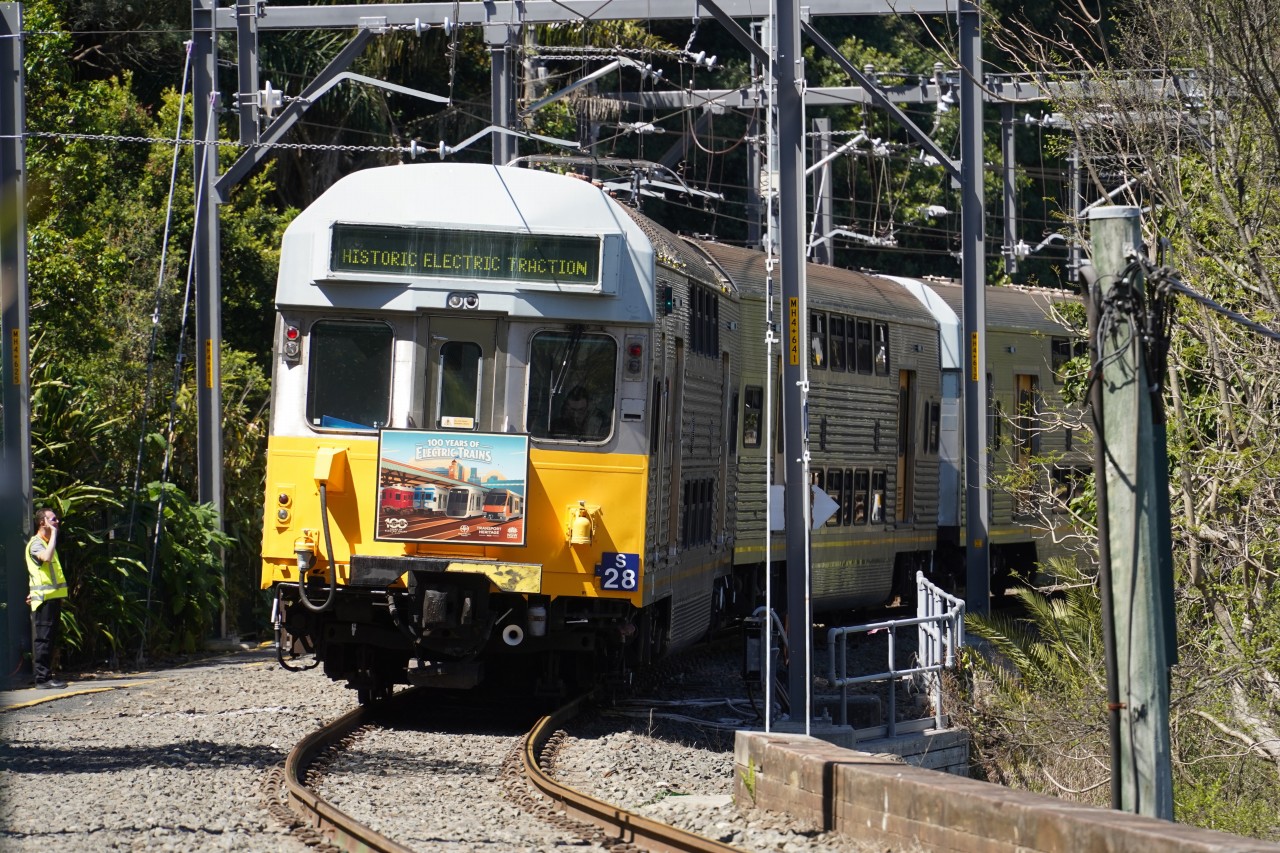
旧ミルソンズポイント駅跡地を発車し、ワイバートン駅方面へ向かうS set。
An S set departs from the site of the former Milsons Point station and heads towards Waverton Station.
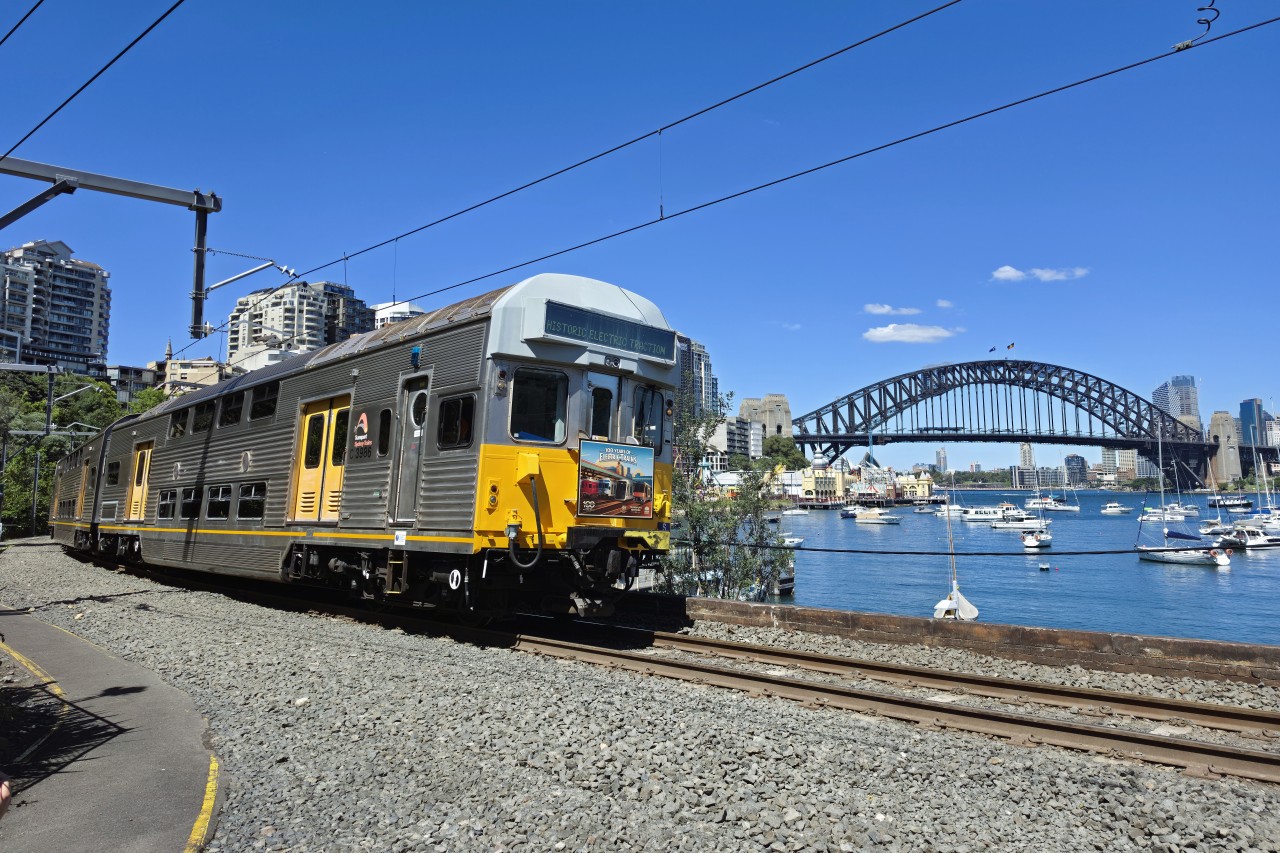
そして、今回一番撮影したかったポイントがこちら。ハーバーブリッジとラベンダーベイをバックに走るS setの姿を撮影することができました。
シドニーの鉄道車両とハーバーブリッジを一緒に美しく撮影できる場所は意外にも少なく、個人的には、これほど綺麗に撮影できる場所はほかにほとんどないと思います。ただし、ここは営業線ではなく、走るのは回送列車のみ。運転時刻も読めないため、撮影のチャンスは限られます。
かつては新型車両の撮影にも使われたことがある有名な撮影地ですが、実際に列車を撮影できる機会は意外と少ない場所です。今回、念願だったこの構図でS setを撮影できてよかったです。
This was the shot I had most wanted to capture: an S set running with the Sydney Harbour Bridge and Lavender Bay as its backdrop. Surprisingly, there are few places where Sydney trains can be photographed with the Harbour Bridge in the background, and in my opinion, this is one of the very best locations for such a view.
However, this is not part of the regular passenger network, so only empty trains run through here, and their movements are difficult to predict. As a result, opportunities to photograph a train are limited.
The location is well known and has even been used for photographs of new trains in the past, but chances to capture a passing train are surprisingly rare. I was delighted to finally get the shot I had been hoping for.
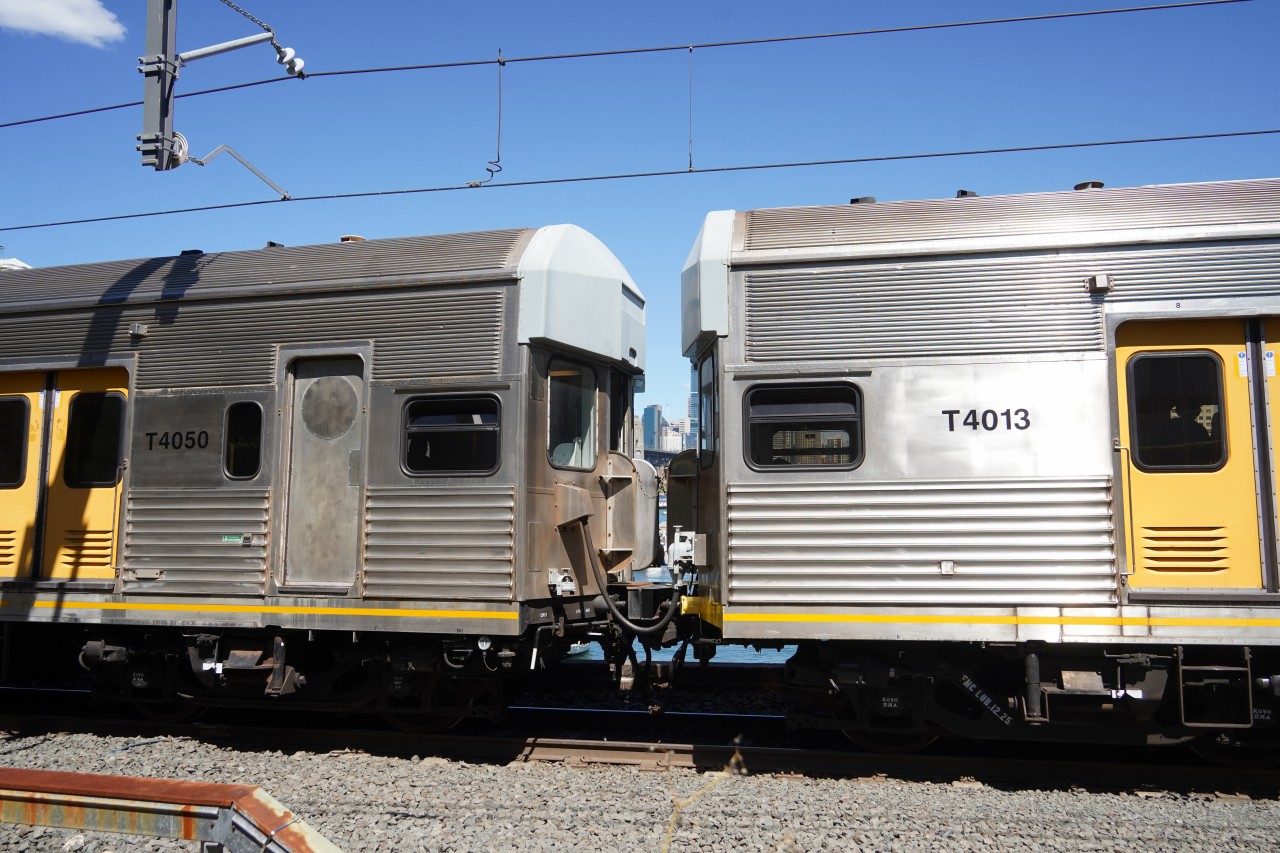
動態保存されている4両編成のS setには、先頭車から中間車へ改造された車両も含まれています。こうした趣味的にも興味深い改造車両を含め、編成全体が保存されている点も見どころのひとつです。
The preserved four-car S set includes a vehicle that was converted from a driving car into an intermediate car. The preservation of the entire set, including these technically interesting modified vehicles, is another fascinating aspect of this train.
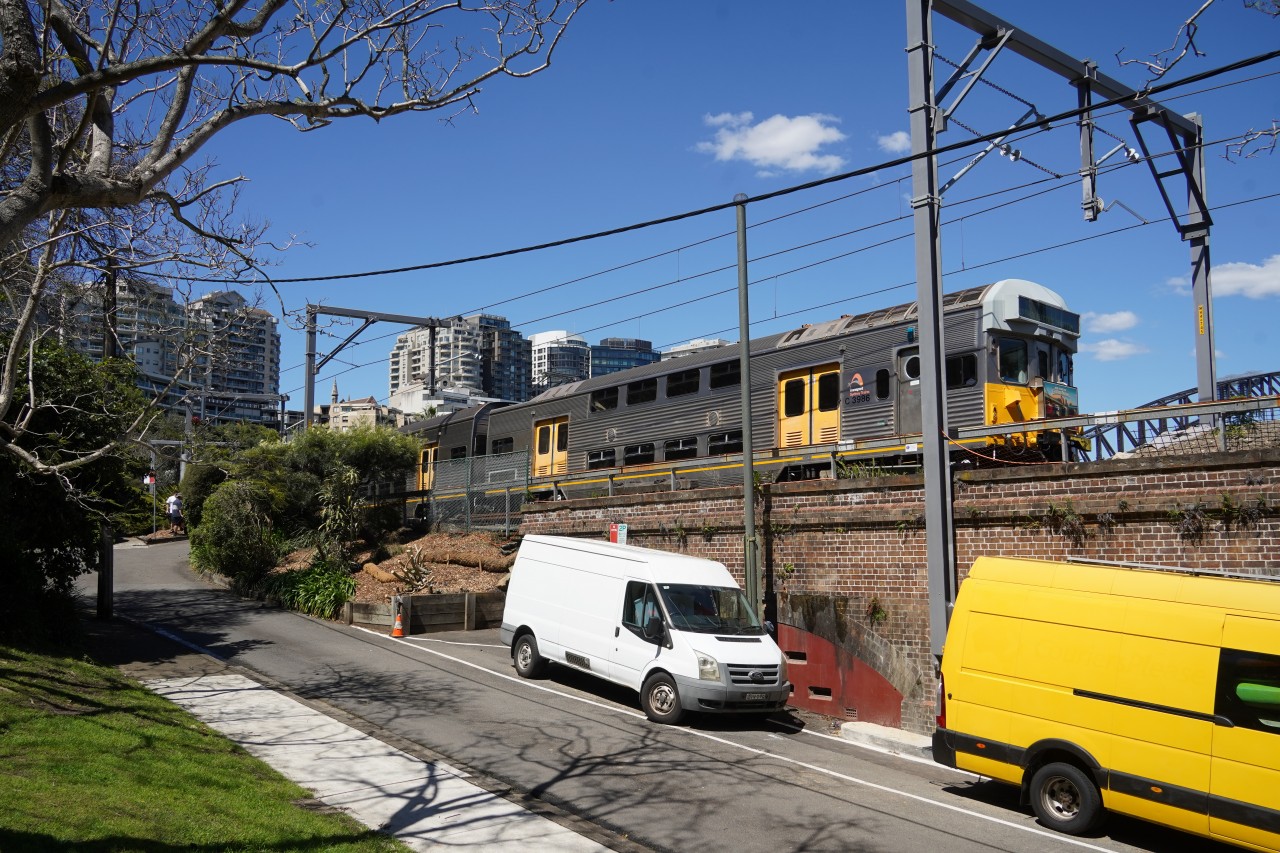
ラベンダーベイの景色を楽しむため、一時停止するS set。列車を支えるレンガ造りの築堤も歴史を感じさせ、周囲の景観とともに往時の鉄道風景を思わせます。
The S set pauses briefly to allow passengers to enjoy the view of Lavender Bay. The historic brick railway embankment supporting the tracks adds to the atmosphere, evoking the railway's rich history alongside the beautiful harbour scenery.
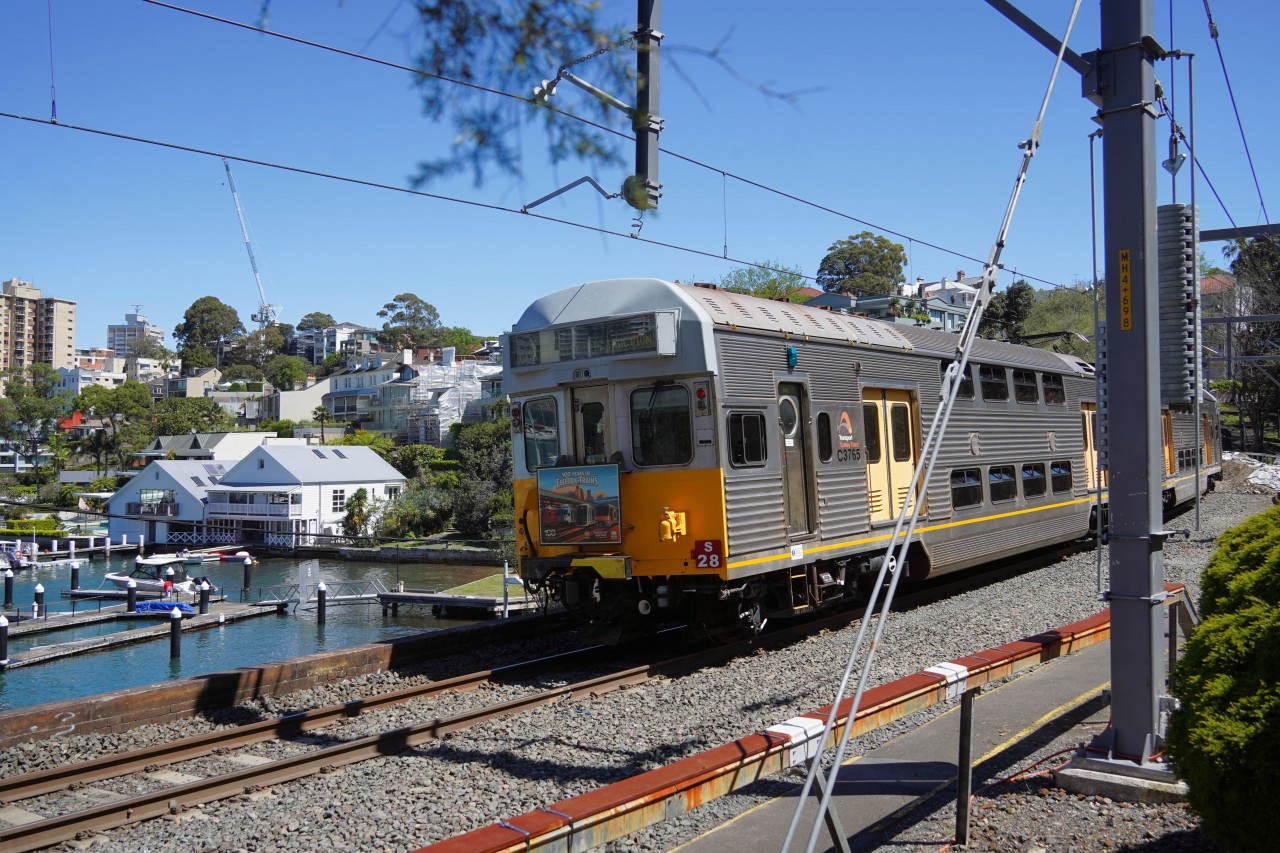
ラベンダーベイを後にし、ワイバートン方面へ走り去るS set。この列車はワイバートン駅で折り返した後、ノースシドニーを通過してセントラル駅へと戻ります。そこで、徒歩でノースシドニー駅まで先回りし、再び同じS setを撮影できるかチャレンジすることにしました。
しかし、ノースシドニー駅まではひたすら上り坂。ブリッジミュージアムの展望台へ向かうために400段を超える階段を上り下りしたばかりで、疲れた足にはなかなか堪えます。
The S set leaves Lavender Bay and heads towards Waverton. After reversing at Waverton Station, the train will pass through North Sydney on its way back to Central Station. I decided to try to get ahead of it on foot and see if I could photograph the same S set again at North Sydney.
However, the route to North Sydney Station is almost entirely uphill. Having already climbed more than 400 steps to reach the Harbour Bridge Pylon Lookout and back, my tired legs were really feeling the strain.
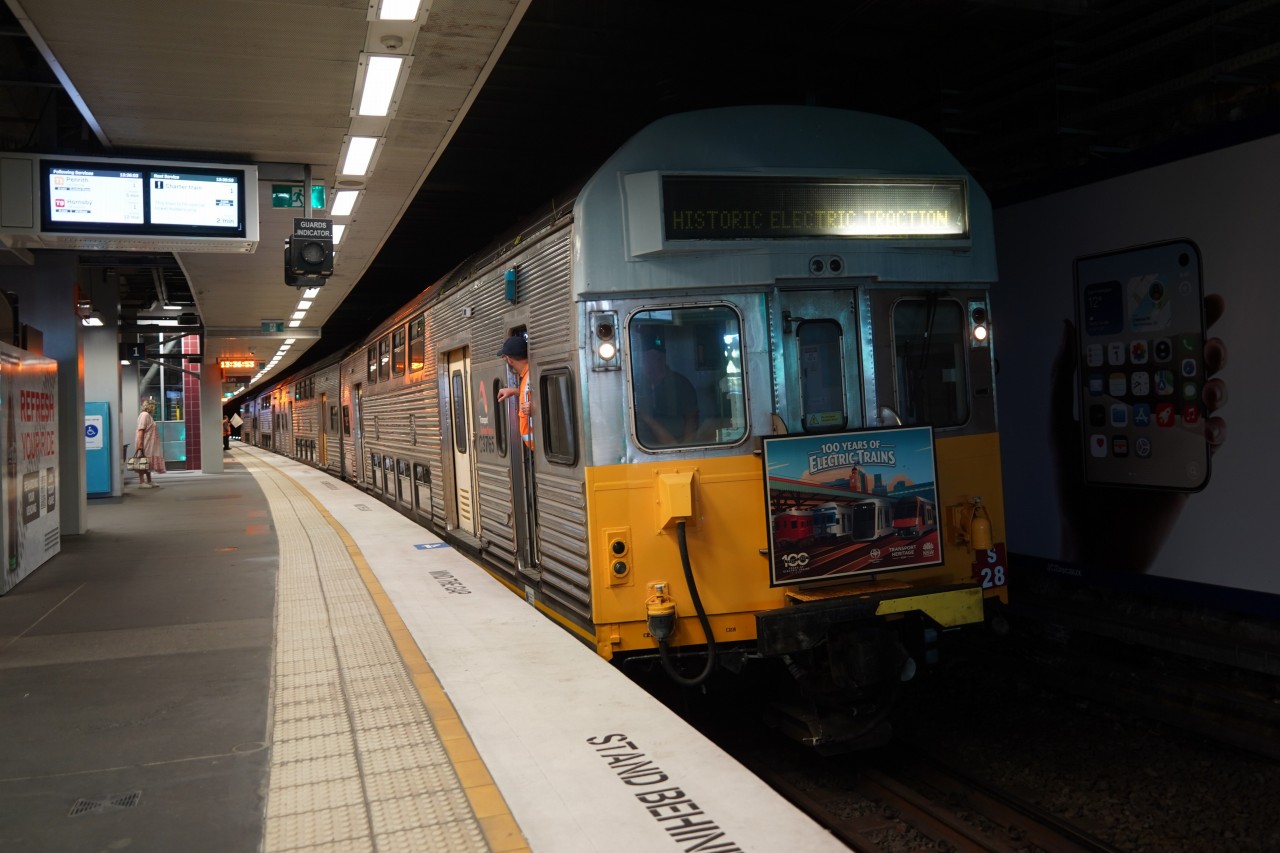
そして、先回りは見事成功!ギリギリで間に合い、ノースシドニー駅を走るS setを再び撮影することができました。半地下構造のノースシドニー駅を走る姿は、現役時代にシティサークルを走行していた頃の姿を彷彿とさせます。
The attempt to get ahead of the train was a success! I made it just in time to capture the S set passing through North Sydney once again. Seeing the train run through the partially underground station brought back memories of its days in regular service on the City Circle.
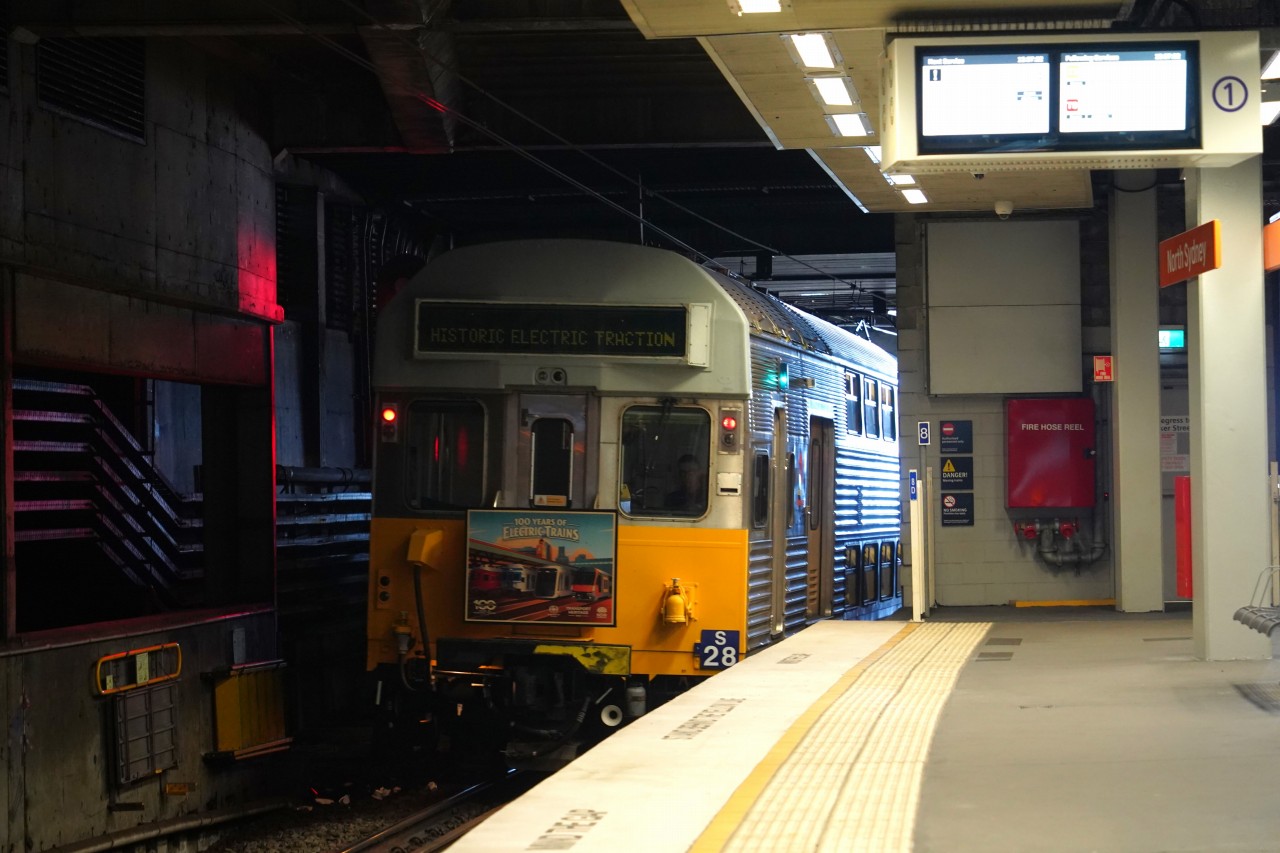
ノースシドニー駅を発車し、セントラル駅方面へ走り去るS set。この日のラベンダーベイトレインは1日3本運転されましたが、残念ながら3本目は撮影できませんでした。この後、別のイベントであるCPH型気動車乗車体験の乗車チケットを事前に予約・購入していたためです。S setの撮影を終え、次はCPH型気動車の乗車体験へと向かいます。
The S set departs North Sydney and heads towards Central Station. Three Lavender Bay train services operated that day, but unfortunately, I was unable to photograph the third service. I had already booked and purchased a ticket for another event, theCPH Railmotor ride experience , which I was due to take part in later that day. After finishing my S set photography, it was time to head to the CPH railmotor experience.
CPH型気動車乗車体験の復路、思いがけないチャンスが訪れました。この日のラベンダーベイトレインの全運用を終え、フレミントン車庫へ回送されるS setを、CPH型気動車の先頭展望席から撮影することができました。
S setの3本目は撮影できませんでしたが、まさか別の列車に乗車中、しかも先頭展望席から回送列車を撮影できるとは思いませんでした。思いがけず沿線でS setの走行シーンを収めることができ、ラッキーでした!
An unexpected opportunity arose on the return journey of the CPH railmotor ride experience. I was able to film the S set being transferred back to Flemington Depot after completing all of its Lavender Bay train duties for the day, from the front observation seat of the CPH railmotor.
Although I had missed the third scheduled Lavender Bay service, I never expected to capture the S set in motion from the front of another train. It was a lucky bonus to get this unexpected trackside-style footage while travelling aboard the CPH railmotor!
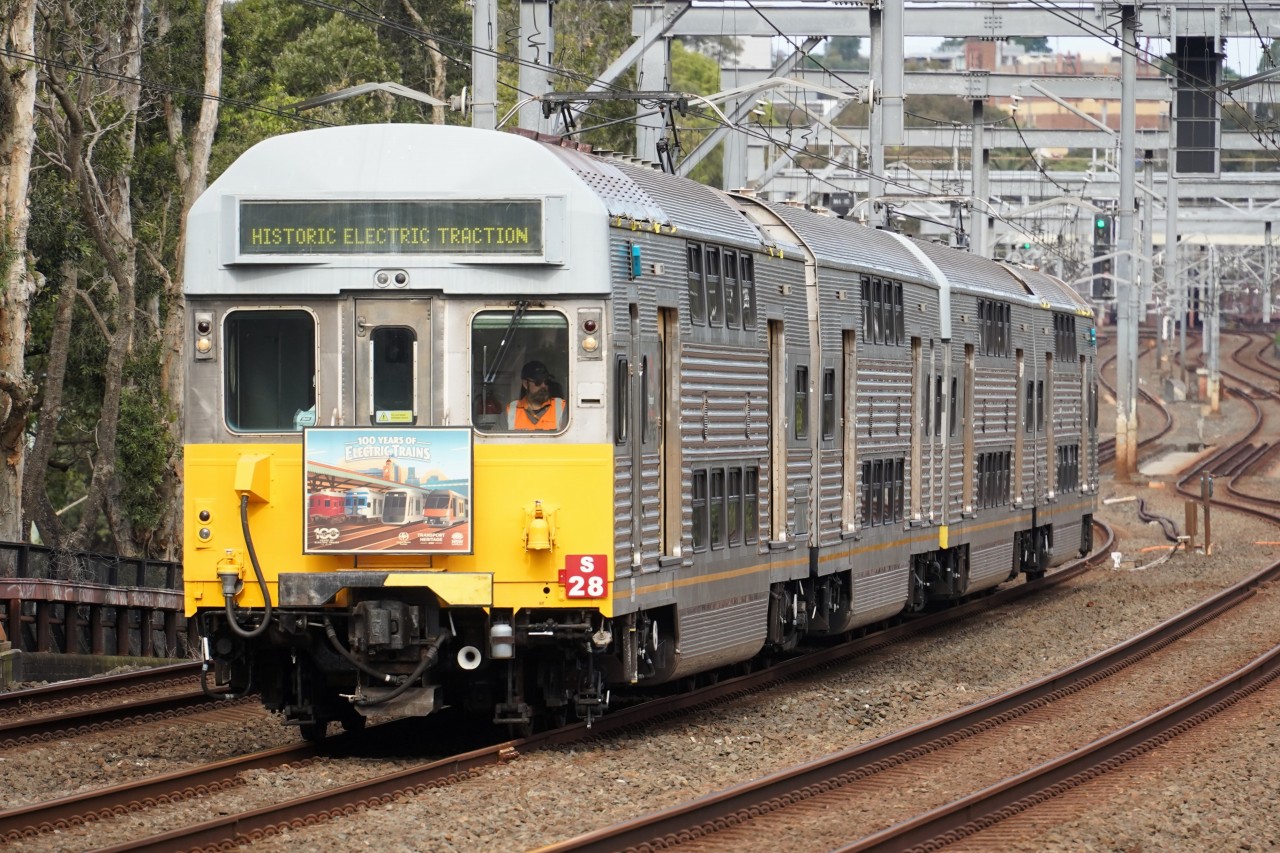
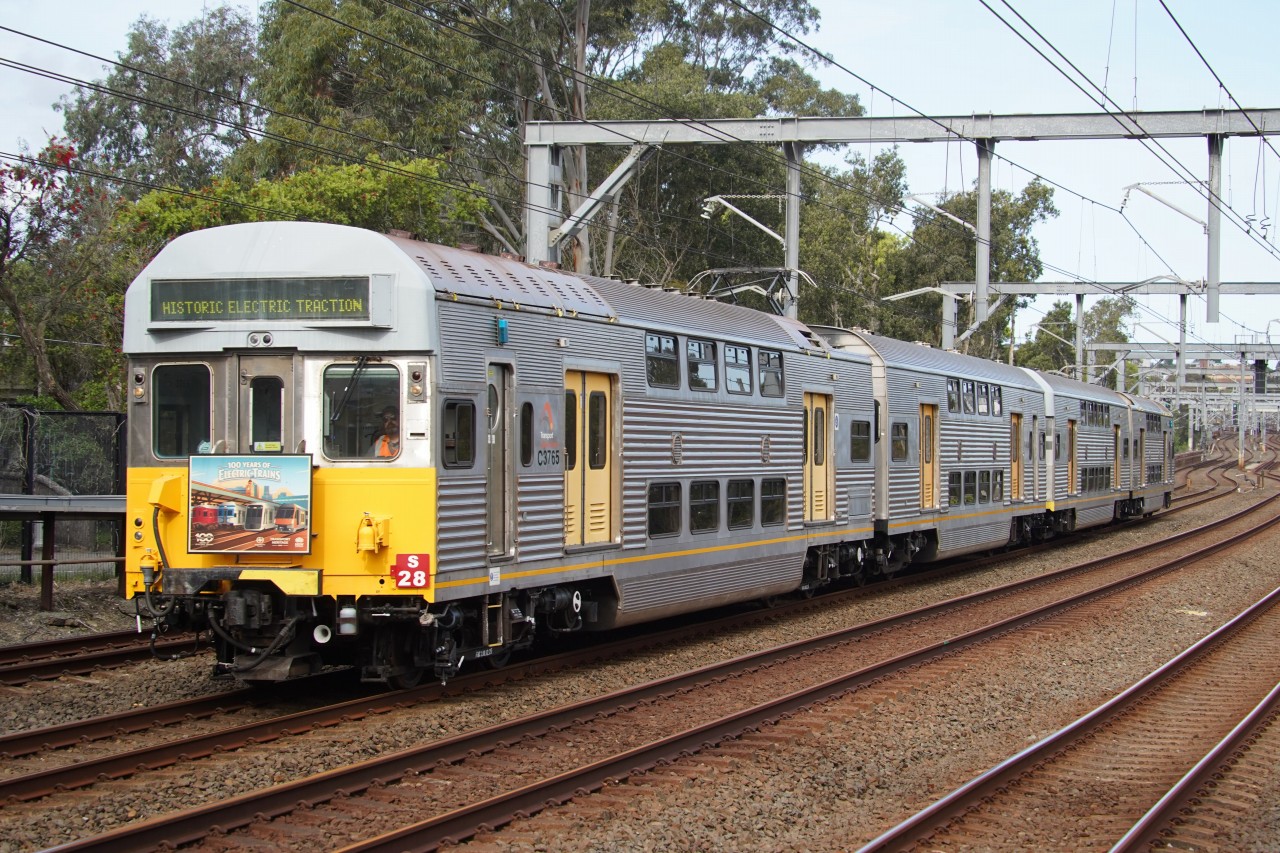
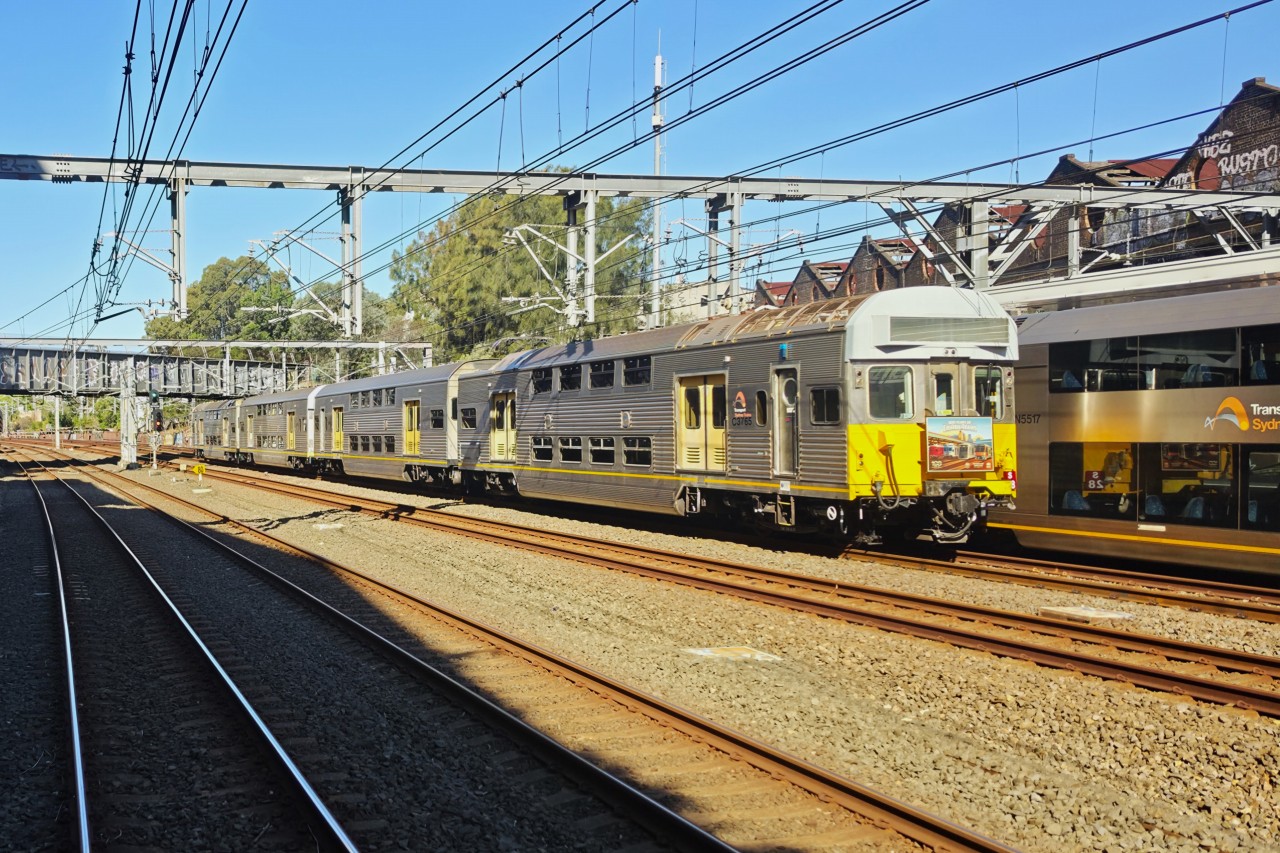
エキスポ最終日、サマーヒル駅でフレミントン車庫へ回送されるS setを撮影。この日の運行を終え、車庫へと戻っていく姿を捉えることができました。
On the final day of the Expo, I filmed the S set at Summer Hill Station as it headed back to Flemington Depot as an empty stock movement, having completed its duties for the day.
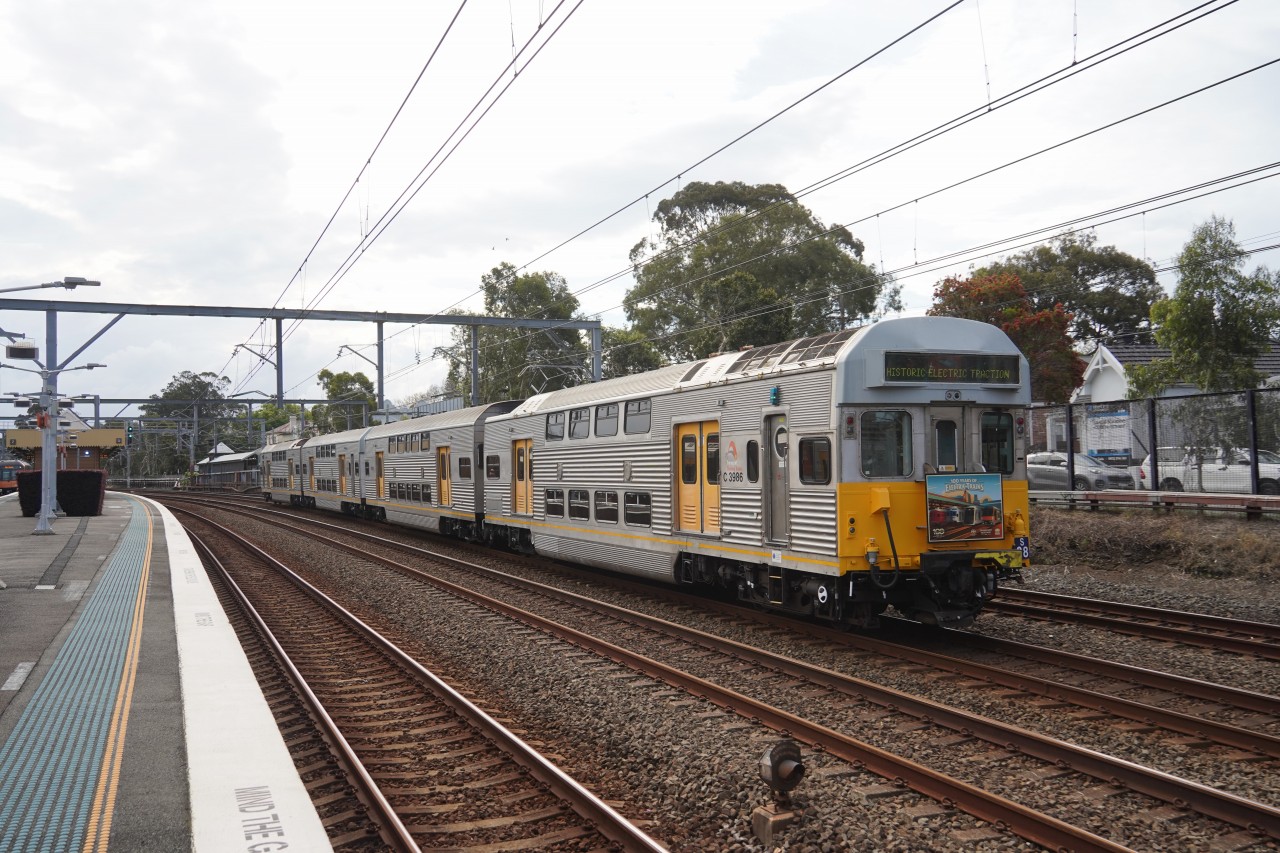
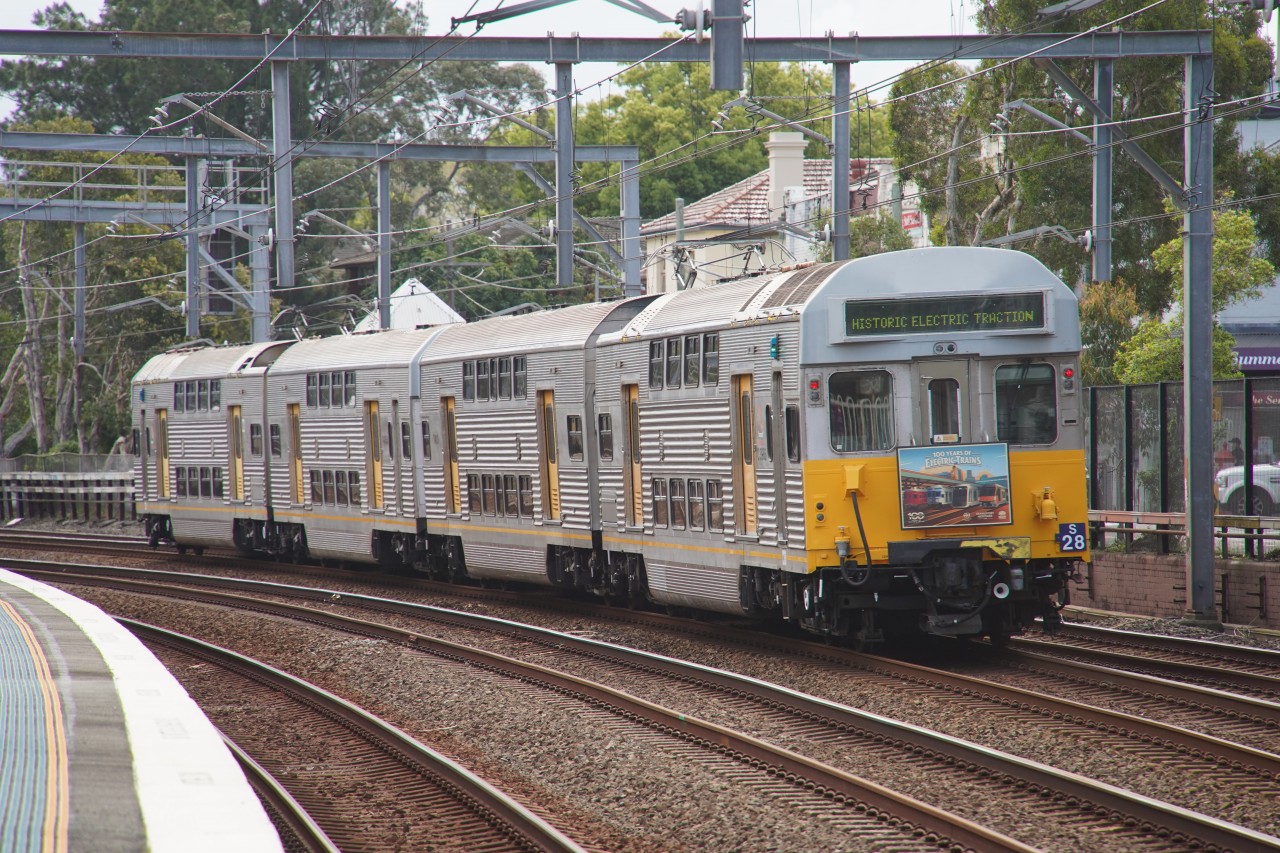
サマーヒル駅を通過し、フレミントン車庫を目指すS set。引退後もこうして元気に走り続ける姿を見ることができるのは嬉しいことです。これからも動態保存されたS setの活躍を追いかけ、その走行シーンを撮影していきたいと思います。
The S set passes through Summer Hill Station on its way to Flemington Depot. It is wonderful to see these retired trains still running in operational condition. I hope to continue following the preserved S set and capturing more footage of it in action in the years to come.
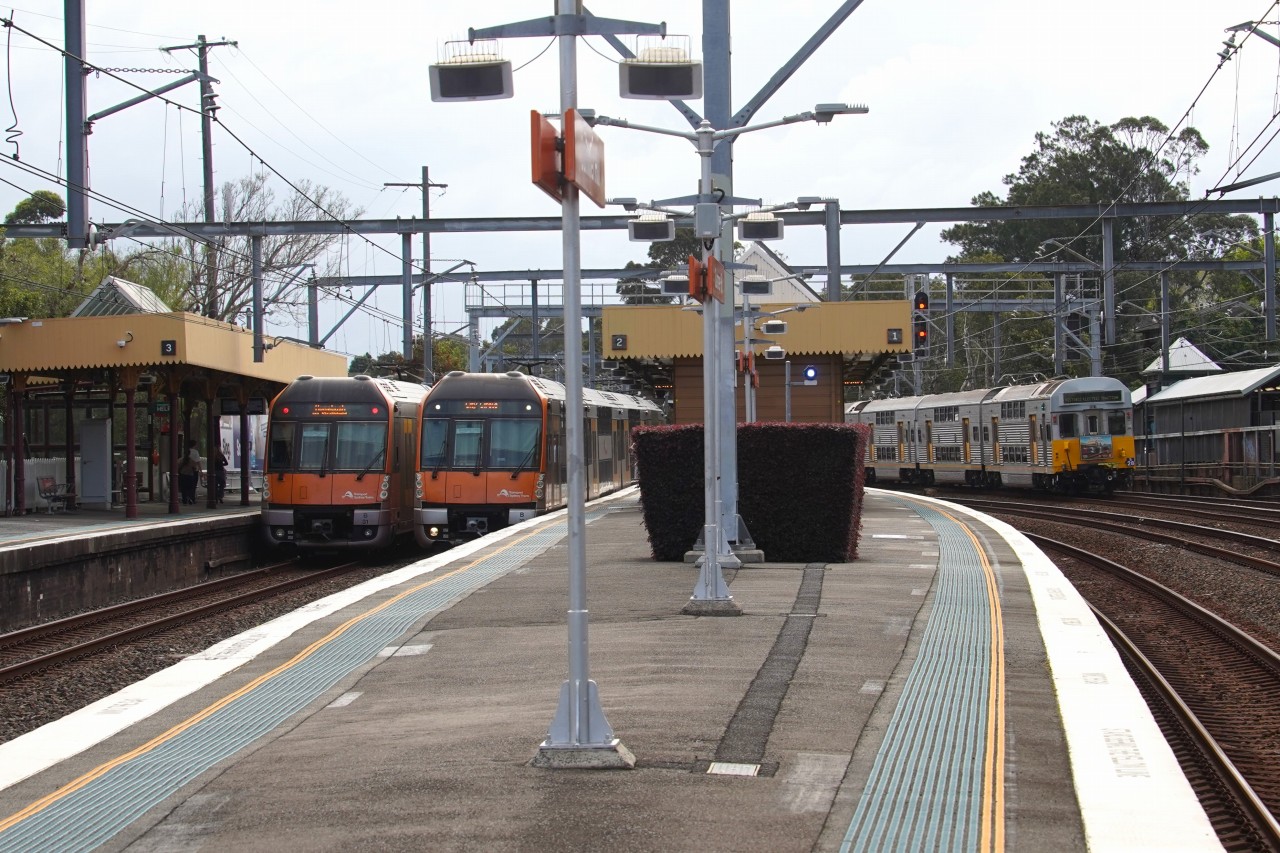
近郊列車の最新型であるB set 2編成と顔を合わせるS set。K、C、T、M、A setと続き、そしてB setへと受け継がれてきたシドニー近郊電車の歴史を感じさせる、最後の1枚となりました。新旧の車両が並ぶ姿は、世代交代の歴史を象徴するような光景です。
The S set meets two of Sydney's newest suburban trains, B sets. From the K, C, T, M and A sets to the latest B sets, this final photograph captures the long history and evolution of Sydney's suburban electric trains. Seeing the old and new generations together is a fitting reminder of the railway's changing eras.
